Join our newsletter
Follow along on instagram.

Work With Us
Learning lab, book a call.

11 Choice Board Templates You Can Use Tomorrow in Your Classroom
February 16, 2022.
Choice Boards are an amazing learner-centered practice you can use to engage your students, provide choice, and easily differentiate instruction.
Rather than start from scratch, we’ve pulled together our favorite choice board templates created by amazing educators.
All you have to do is click the link to access the template, make your own copy, and start customizing. Let’s dive in!
- What is a Choice Board?
- Getting Started Guide
- Template #1: 9 Square Design your Own Digital Choice Board
- Template #2: Creative Book Trailers Ideas
- Template #3: Geography Fun Choice Board
- Template #4: Digital Breakout
- Template #5: Digital Menu for Student Creation
Template #6: Choose Your Own Adventure (Slides & Forms)
- Template #7: Show What You Know
- Template #8: Genius Hour
- Template #9: Fortnite Digital Choice Board
- Template #10: Design Your Own Choice Board
- Template #11: Flexible Choice Board
What is a Choice Board?
A choice board, also known as a learning menu, is a great way to differentiate learning for students and allow them to demonstrate mastery at the end of a unit as well.
Choice boards can be created in various formats, but a simple way to think of them is as a graphic organizer.

Credit: Tom Spall
With digital tools, you can take static, paper format activities and bring them to life.
Choice boards also help to engage students, give them choice in the way they learn, and create a more interactive learning experience.
Choice boards are pretty easy to create and the best part is you can be creative in how and where you build it, so it’s customized to your students’ needs.
Below you’ll find eleven plug and play templates you can use right away in your classroom.
It might seem a bit daunting to start from scratch so all you need to do is make a copy of the template and start customizing.

If you’re new to choice boards, here are a few guides to get you started:
- The Ultimate Guide to Choice Boards and Learning Menus
- The Complete Beginner’s Guide to Choice Boards
Below you’ll find tons of choice board templates created by amazing educators that you can use across multiple grade bands and content areas. All you have to do is click on the link and you’ll get your very own copy to use in your classroom.
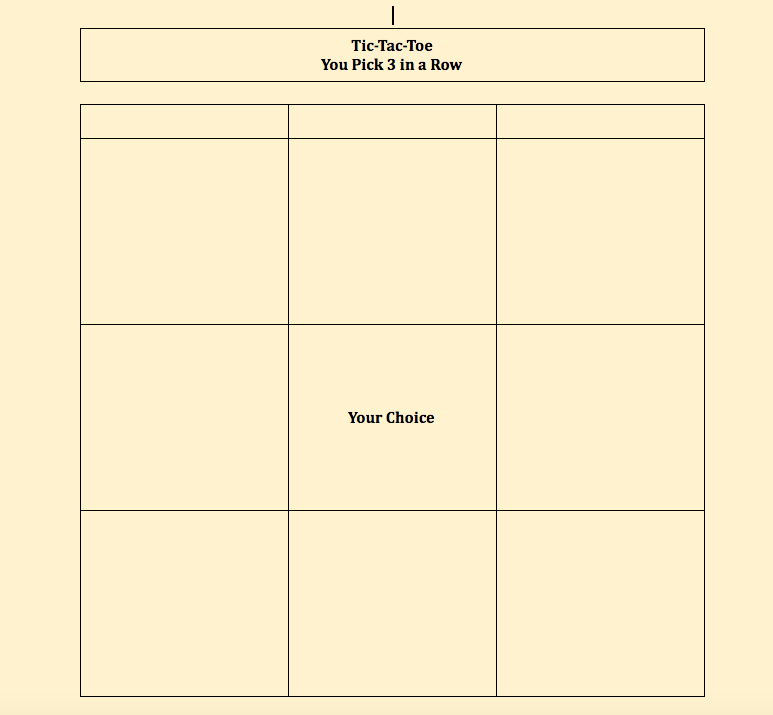
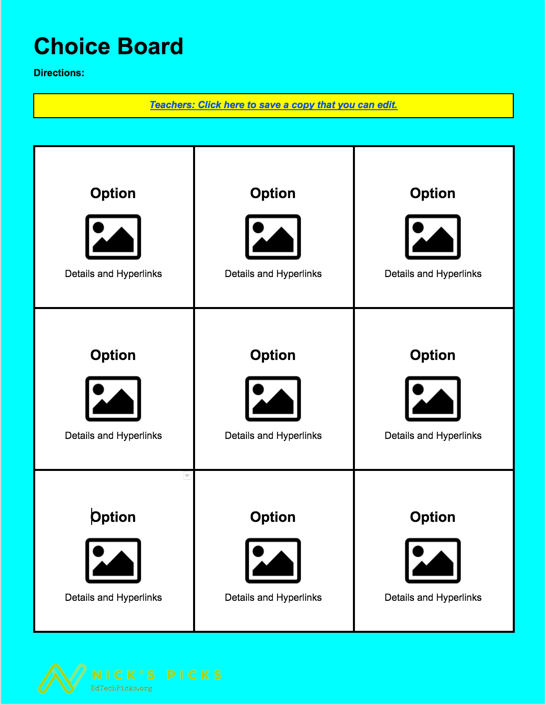
Template #1: 9 Square Design your Own Digital Choice Board – Catlin Tucker
>>> Click here to access the template (this link will prompt you to make your own copy)
This choice board template is created by Catlin Tucker and it follows the classic 9 square model.
This allows students to follow a tic-tac-toe approach where they can complete any three activities in a row on this board.
With this format, you can organize a column by a specific topic, skill, or standard.
The best part about this template is that it gives you the structure to easily design your own choice board, but you can really make it your own.
Elementary 9 Square Template
- Kindergarten Tic-Tac-Toe Choice Board – Math and ELA – A.J. Juliani
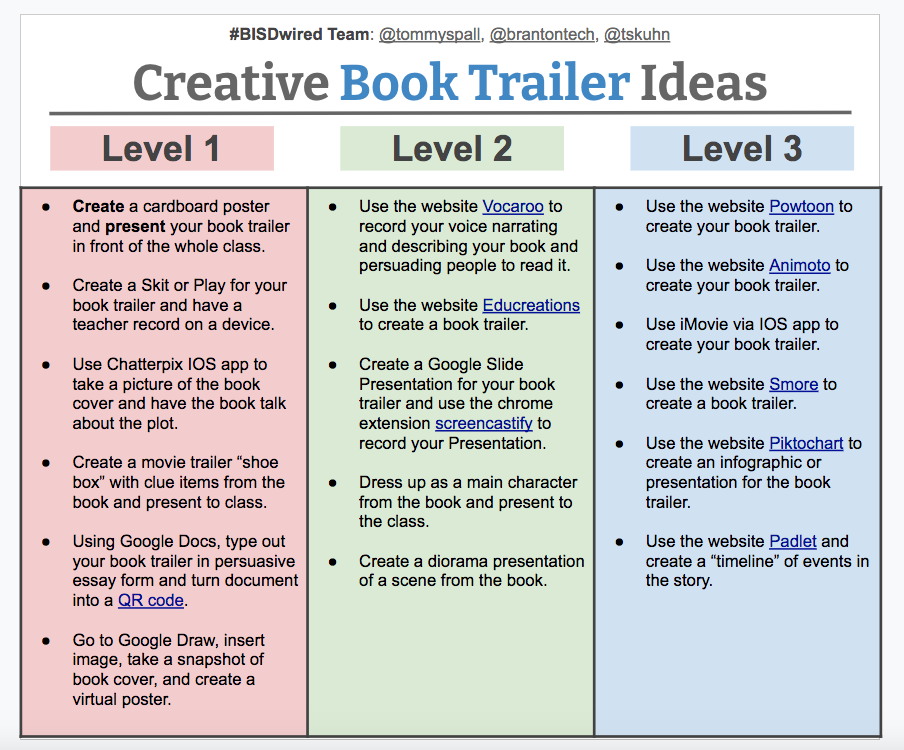
Template #2: Creative Book Trailers Ideas – #BISDwired team
>>>Click here to access the template
This choice board template was created by the #BISDwired team and it shows you how you can create a choice board that uses several different types of tech tools and platforms to create an engaging experience for all students.
This choice board includes a project-based learning element and focuses on book trailers, but you can use this format for any content area.
Template #3: Geography Fun Choice Board – Shannon Miller
>>> Click here to access the template
This one is for all of the elementary geography teachers! Shannon Miller has created a great choice board with BrainPop videos, games, maps, and more that students can interact with to learn about geography.
You can make a copy at the link above and use it right away in your classroom or switch it up and add in your own resources and activities for students to complete.

Template #4: Digital Breakout – Lauren Hawkins
>>> Click here to access the directions on how to create this .
You can also use a choice board to create a breakout activity for your students where they work together or on their own to solve tasks and problems to move to the next step and complete the activity.
This is a fun way to engage your students and increase collaboration!
Lauren has put together an amazing resource with all of the directions, templates, and how-to videos at the link listed above.

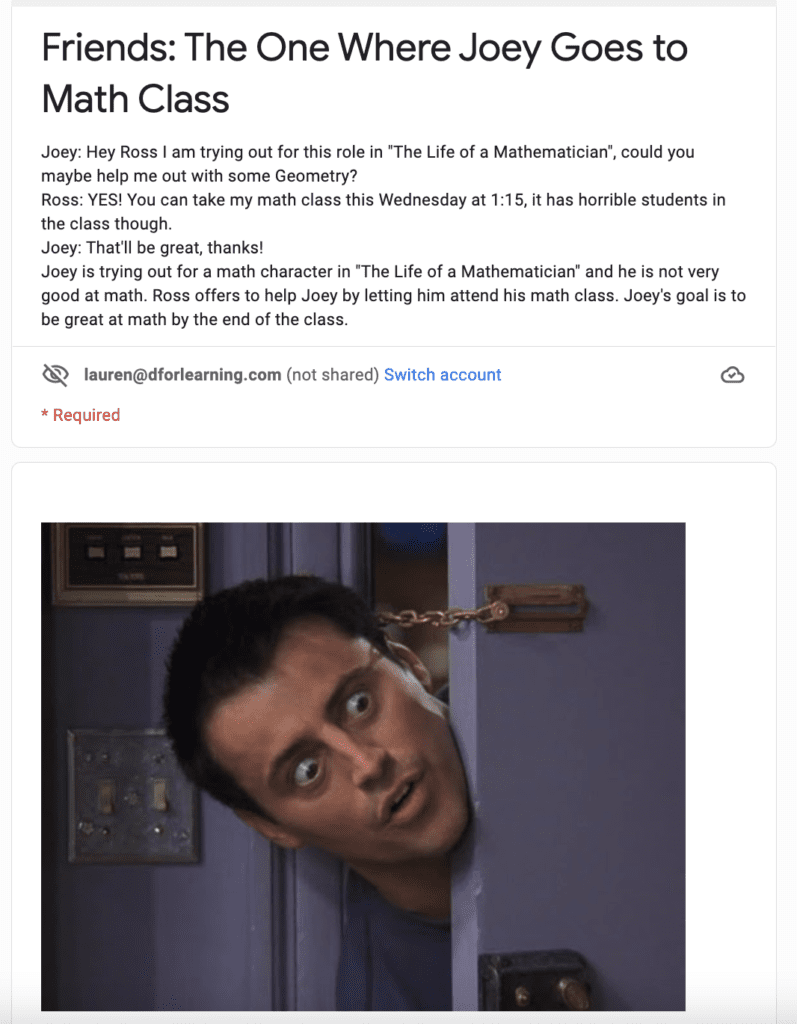
Template #5: Digital Menu for Student Creation – Tom Spall
This choice board combines multiple tech tools and platforms to provide choice with different activities that range from low tech – to high tech options.
This also allows students to build upon skills like communication and creativity, as well as develop new tech skills.
***For the Google Slides Templates make sure you present the slides for the links to work
- The Secret Villiage – Created by Nathan Gildart
- Math Sample #1 (Friends Theme) – Created by Nathan Gildart
- Math Sample #2 – Created by Nathan Gildart
- The Lost Baby Tiger Template – Slyvia Duckworth
- Left Home Alone – Created by Nathan Gildart
- The Online Adventures of Mousy and Mickey – Created by Nathan Gildart
- Choose Your Own Adventure Template – Created by Nathan Gildar
A choose your own adventure choice board is a great way to give yourself a break from presenting or delivering a lesson.
With this choice board, you can give students voice and choice in how they learn and they can go at their own pace to complete the lesson asynchronously.
We’ve linked some of our favorite choice board templates above for you to get started with.
Template #7: Show What You Know – Lisa Highfill
>>> Click here to access the templates
This type of choice board is pretty self-explanatory, but the templates linked above allow students to express themselves and choose to demonstrate their learning in the way that works best for them.
This choice board format also provides students the opportunity to use different types of technology to build new skills or refine current ones.

Template #8: Genius Hour – Christine Perkins
Genius hour is an amazing learner centered strategy that allows students to focus on projects of their choosing for one hour each week.
Genius hour is always a hit with students and it can help them identify hidden skills, develop their skills and find topics they’re passionate about.
Sometimes these boards can take longer to create so this is why we’ve pulled together a template you can use right away or copy and customize for your classroom.

Template #9: Fortnite Digital Choice Board – Tom Spall
This is a fun template that students get really excited about!
They can create a project in the format of their choosing and this template also fosters collaboration.
You can use this template for any unit, project, or content area by customizing the options students can choose from. You can make a copy of this template and add in projects or activities that are aligned to your rubric.
Template #10: Design Your Own Choice Board – Nick LaFave
This is a simple choice board template you can follow and all you have to do is add in images and text.
The template linked above will prompt you to make your own copy and you can customize it to fit your needs.
Template #11: Flexible Choice Board – Knikole Taylor
An amazing educator, Knikole Taylor has designed this template to help you quickly and easily create a choice board for any subject area.
You can use this template time and time again. The link above will prompt you to make a copy.
So…What Do You Think Of These Choice Board Templates?
Now we want to hear from you.
Leave a comment and share your favorite choice board template that isn’t in this post or which template you’re going to use first!
Looking for more resources?
- 20+ Insanely Actionable Teacher Resources You Can Use Today
- Free Blended Learning Workshops
- How a Technology Integration Specialist Used the Pandemic as a Way to Invite Change
[…] 11 Choice Board Templates You Can Use Tomorrow in Your Classroom […]
I love the Genius Hour template, but it says I don’t have access. Is it possible the owner could change share settings?
Hi Hannah, Thank you for reaching out! The owner has changed the share settings and unfortunately we haven’t had any luck in getting the settings changed. I’m so sorry! I will reach out to our training team and see if they have other resources like this.
Leave a Reply Cancel reply
Your email address will not be published. Required fields are marked *
Save my name, email, and website in this browser for the next time I comment.
Ready to Keep Learning?
« how a technology integration specialist used the pandemic as a way to invite change, 25 free jamboard templates for k-12 teachers ».

Free pd in 10 minutes or Less
Start learning, visit the learning lab.
More a visual learner?
Check out the learning lab full of short, actionable PD videos. You'll find the Foundations with all of the basics and step-by-step support on top tech tools...and Bite-Sized PD on how to take those tools and confidently integrate them into your classroom.
VISIT THE LEARNING LAB
Is your staff ready for personalized, relevant pd that leads to classroom implementation, partner with us, is your staff ready for personalized, relevant pd that leads to classroom implementation, partner with us, book a call with us, back to top, design studio.

Get weekly tips, strategies, and content created for you delivered right to your inbox.
Become a friend, sign up here.
©Designed for Learning 2023 | Privacy Policy | Cookie Policy
Connect With Us
Join our Newsletter
Follow on Instagram
Ultimate Guide for A+ Science Fair Project: Science Fair Board Layout Ideas & Examples
- September 27, 2021
- Kids Printables , Science Fair Ideas
Science fair project displays can seem like a daunting task for many students. However, there are some simple tips and tricks to make it easier for yourself!
This article will help you with your display by giving you free layouts and examples to use.
We provide a variety of science fair board ideas designed for different purposes, such as displaying all your entries or just some of them.
There is also information about how to organize your project, what materials you will need and more..
Steps to Plan Your Science Fair Display Board
We have learned the following advice from working with thousands of middle school students over the years.
By reading this post and following the tutorial, you will be on your way to a great display that will impress judges, parents, and spectators.
Your display board will be the only part of your science fair project that your child and anyone visiting the school will see. It’s your opportunity to show the judges that your child deserves recognition for their project and all the hard work they’ve put in.

So, how do you put together a plan for it?
Many project display boards follow a schematic format and are typically outlined in black marker, usually in columns. The columns represent the different pieces of information that the board contains.
Create a detailed plan of your project and board.
If you’re unsure where to start or how to go about it, consider the complete science fair project steps below.
2. Organize
3. Research
8. Evaluate
Know Rules / Regulations of Science Fair Competition
When it comes to the judging of science fair projects , it’s important to know the rules. Most competitions will have a list of criteria for judging, and following these can help your project stand out.
If you’re following a science fair project book, check its list of judging criteria. Many science fair books have a list of categories and points for each, so you can run a quick Google search to see if your book matches up with the criteria of the competition you’re entering.
If you’re entering a local science fair, ask someone there about the criteria for judging. Many local science fairs have online entry forms where you can also find out about criteria.
If your competition is online, go to the competition website and search for the rules or criteria. Many science fair websites have downloadable copies of their rules, so you won’t have to hunt them down.
You might also ask the science fair coordinator or teacher for a copy of the rules. Many science fairs take entries online, so organizers have access to this information.

If you’re entering a national science fair, check its website for rules. Science fair rules vary widely from competition to competition, so you may have to do a little more research, but it’s usually not hard to find.
Once you’ve found the rules, make sure to follow them. Certain rules may vary from school to school, so it’s best to do a small web search first.
Some science fair rules might be hidden; be sure to look in the “Additional Information” section or check the website’s FAQ page. If you’re still unsure whether the rules apply to your project, ask the teacher or coordinator.
Sections to cover in Display Board

The science fair project display board is the students’ opportunity to showcase their hard work and how they solved a problem or question.
Good science fair project display boards should be organized, easy to read, and visually appealing. The science fair judges are not scientists, and their science fair project displays should be the same way.
There are two main parts to a science fair project display board: the header and the body.
The header should include:
– Your name
– the category you belong to (“Chemistry” or “Math”)
– your science fair project title
– the district or region you belong to (“Chicago,” “Illinois,” “Midwest”)
– and your grade level
Body aka Science Fair Display Board
The display board is the body of the display and should incorporate all the details of your science project. The typical science fair project display board is made up of several standard components.
The display board should include the following information:
Title and Name of Project
The title and name of the project should be clearly written on the board, and the project information should be written on the board clearly and concisely.
The science fair project display board title may include the project title, your name, and your school name.
Background information
The background section includes background information about the project.
The hypothesis section includes your hypothesis or what you are hoping to prove. The problem or question that the student attempted to address.
Materials Used
The materials used in the project should be listed along with the quantity used. You can also include a list of the tools and equipments used in the project.
The methods section includes your methods or how you went about proving your hypothesis. The method by which the student attempted to address the problem or question.
The steps of the procedure should be written on the board.
Results and Final Outcome
The final result, product or outcome of the experiment should be displayed on the board.
Significance
The significance of the project to the child and to his or her community.
Reference list
In this part, include necessary references to the project that you used.
Photos / Graphics
Try to include as many visual elements as possible to make the inference clear and simple.
Things to Consider while Designing Project Display Board

A science fair project display board is the first thing people look at when visiting your project room. Therefore, it is important to make a good impression.
You have to consider certain things while designing your project display board. For example,
* The background is very important. You can use any board or paper for the background, but keep in mind that the white colour needs to be bright.
* Use colour contrast. Use colours that are in contrast with each other. For example, you can use a black background with white-coloured text.
* Consider your theme. If your project is related to space, then consider using a space theme for your project display board.
* Use pictures. Pictures give your project display board a personalized touch.
* Include important information. Include information regarding the topic, as well as contact information.
* Use graphics. You can use graphs, diagrams, and figures to make your project display board look more interesting.
Size of Project Display Board

A science fair project display board is a large sheet of paper, poster board, or foam core used to display information about an experiment in a science fair.
The size of the board should
be at least 36″ x 48″.
The dimensions of the science fair board should be 2 feet wide by 3 feet long, and this allows for ample space to cover all the details and diagrams needed to present the research at an exhibition level.
Most science fair display boards have a 4′ by 10′ layout, which gives you plenty of room to cram all your data, photos, and drawings. But, if you want to pack in more information or a larger display board for a big project, there are alternatives.
One approach is to make the board out of the poster board. Posterboard comes in 2′ by 3′ sheets. You can arrange the sheets end to end to make a 12′ by 36′ display board. You don’t have to put these sheets together, though, and you can just join them at their corners and cut your display board to size.
You can also make a display board out of foam core. Foamcore comes in 2′ by 3′ sheets, too. You can buy it at most office supply stores. But, as with poster board, you don’t have to put these sheets together to make a display board. You can join them at the corners, cut your board to size, and glue the sheets together.
standard science project board size

The standard scientific board size is arbitrary.
(It was originally called the Lincoln Board.) But it’s arbitrary in the same way that a dusty tube of paint is arbitrary. The colour you paint with isn’t important; what’s important is what you paint.
The rectangular board is better for making things. You can make almost anything rectangular, including mazes, making rectangular boards better for displaying science fair projects.
Once you’ve selected the perfect science display board, you have one final task: setting up the display.
How to set up a science project display board

So you’ve found the perfect project, and you’re ready to construct your display board. Congratulations! Now, how do you get started? First, find blank poster board (or foam core) in sizes appropriate for your project. You’ll need at least a 24×36-inch poster board for your display board’s background (this is called a “background board”).
Then, find an image file or paper printout of your project. You’ll need to “posterize” this printout or image for use as your display board background. Posterize simply means shrinking or stretching it to fit within the boundaries of the poster board. The image below shows how you can do this:
Now, place the background board on a flat surface.
Center your printout or image on the board, and trim any excess.
Next, tape the printout or image to the board.
Then, tape the poster board to a flat surface (such as a table or countertop).
Finally, tape the decorative border (if applicable) to the board.
You now have your display board.
One simple rule to remember: Don’t crowd your display board.
Project display boards often serve a dual purpose. On the one hand, they provide a space for showcasing projects, but on the other, they serve as a gathering space for students and families.

Here are some tips to make the most of your display board, whether you’re hosting or attending:
1) Placement is crucial. Make sure there’s room to move around the board and that it’s possible to read everything on it. Most boards should be 18 to 24 inches high and 36 to 48 inches wide.
2 ) Color counts. Colour helps differentiate projects. If you’re planning on hanging your display board, consider the colour contrast. Black text on dark backgrounds is easier to read than dark text on light backgrounds.
3) What goes on the board? Consider the length of your project. A 15-minute project should be photographed, but projects lasting more than 15 minutes should be described in the text. Test different layouts to make sure the board can be navigated easily.
4) How much detail? Photos should clearly show the project and explain how it works. Avoid “bullet points.” Students should be able to follow a project from start to finish without having to read anything.
5) Consider lighting. Try to place the board in an area that receives plenty of natural light. If your board is hung, make sure it has plenty of light behind it.
6) Writing. Consider using dry-erase markers. Writing on the board with a dry-erase marker is a quick and easy way to jot down notes, check off items on a to-do list, or display student responses.
7) Think about storage. You’ll want to store the board
Display Board Layout Types

Display boards can be in different shapes, designs, and sizes, but a few standard layouts work well for science fair projects.
1. The “step and repeat” layout is the most common. This layout features one central background or image with many smaller images, text or graphics surrounding it.
2. The “block” layout is similar to the step and repeat, but it uses one large image, maybe with text or graphics, surrounded by smaller images or text.
3. The “grid” layout is similar to step and repeat, but it’s organized like an Excel spreadsheet, with columns and rows.
4. The “storyboard” layout features one large background or image with several smaller images, text or graphics around it.
5. The “poster” layout features one central background with a picture or text of project steps or process above it.
How to choose the best title for your science fair project

You spend hours or even days doing experiments, coming up with ideas, and collecting and documenting data. Many kids don’t realize that 80% of the hard work is done before you even start the project.
The first step in the process is to choose a good title for your project. This decision can make or break your project.
A creative, funny, or interesting title will catch the judges’ attention and may even make them laugh. On the other hand, a dull title may turn them off.
How you choose to title your science fair project says a lot about you. Your project’s title should be short but catchy. Your title should describe your project and highlight it.
So, how do you come up with a good title? There are several ways.
1. Ask an adult.
2. Look at the pictures on the magazine covers.
3. Make a list of your topics.
4. Do an Internet search.
5. Look for other interesting titles.
6. Think about funny titles.
7. Think about titles that will grab attention.
8. Think about descriptive titles.
9. Think about titles that express excitement.
Why Images / Visual Items are Important for Science Fair Display

Visualizing your work is a great way to help other people understand it, so it’s important to make sure that your presentation is always clear. For example, if you’re making a poster, the first thing people will see is your title and subtitle, followed by your visual elements.
A science fair project display board presents several challenges. The first is making sure your text and graphics are the right sizes, so they don’t overwhelm your viewer.
The second challenge is making sure your text is easy to read. Many science fair display boards have a bold font. That can work if the font is easy to read, but in general, it’s better to go with a more subtle font that doesn’t compete with your visuals.
Your visual elements are just as important as the text. Images and charts need to complement your words, not overpower them.
The biggest mistake you can make is not including your visual elements. It’s important that other people understand what your project is, and images can definitely help with that.
For example, if your project tests the effect of a fertilizer on plant growth, pictures of different plants with different fertilizer levels would be important.
If your project is about the effects of pollution on fish, images of fish with different pollution levels would be important.
For a project about the effects of global warming, images of ice melting and icebergs breaking apart would be important.
Putting in a lot of effort to make your science fair project display board appealing and appealing is worthwhile. People will be interested in your project, and it will help make sure you achieve a good score.
Visual items, such as charts, graphs, photos, and displays, are unnecessary for every science fair project. Still, they do help to make the display more interesting and easier for the audience to understand.
It’s a good idea to have several different visual elements on your science fair project display board.
This lets the judges know you’ve thought carefully about the project and that you’ve done your homework.
Plus, having an array of visual elements allows the judges to compare and contrast your project with others.
Labels for Your Project Display Board
It seems like a lot of work to print out labels for all your charts and graphs for your science fair project display board. But, once it’s done, you’ll wonder why you didn’t label everything yourself.
First, you need to prepare the label sheets. Most printers come with label sheets, but you can get label sheets at any office supply store.
Get Free Project Display Board Labels from here
To make a label sheet, you just measure the height and width of the space you want to label and divide that by the label size. For instance, my label sheet measures 8.5″ by 11″. This means that I can print 8.5″ by 11″ labels.
Then, you print the labels on regular printer paper. To print labels, you simply select ‘Label’ from the printer menu.
When you’re finished, you just cut around the labels and punch a hole in them with your label puncher.
Here’s how to label all your graphs and charts:
1. Print the graph/chart onto the label sheet.
2. Cut around the graph/chart on the label sheet.
3. Punch a hole in the top left corner of the label.
4. Attach the labels to your graphs/charts with pushpins.
How to Setup Background for Your Project Display Board
A display board isn’t exactly a wall, so it doesn’t have to withstand as much weight or pressure. But if you stuff your board too full, people won’t be able to take in all the information you’re trying to convey.
Also, if your background is too busy, people won’t be able to read everything you’ve written.
On the other hand, if nothing stands out on your board, it might not even catch the eye of judges.
How to make informed decisions about background colours:
Use contrasting colours. Use colours that don’t match. Think complementary.
Use neutral colours. Use blacks, greys, whites and muted shades. These colours won’t distract the judges from what you have to show them.
Use bright colours. Use colours like yellows and oranges, but only very small amounts. Too much of it will stand out like a sore thumb.
Use colors that are neutral or bright. Use both dark and light versions of the same colours. This will balance your display.
Use dark colors. Use colors like grey, brown, or black. These colors aren’t as bright or distracting as bright ones.
Don’t use too many colours. Use no more than three colors for your background.
Stick to shades of the same colour for your background.
Background colours should be pleasing to the eye. Bright colours tend to grab attention, but dark colours can make your display look more mysterious. Select colors that blend well together for your specific project.
Why & How to Use Tri-fold display boards
A trifold project board is a formal way to present and display your science fair project. Often, the trifold display board consists of one large panel, which is divided into three smaller panels.
A tri-fold Science Fair display board often comes in single or double-sided versions, but the board can be any shape. Double-sided displays are more economical, but single-sided display boards provide more flexibility.
Your project display board needs to be large enough to hold the information you present but small enough to fit on a classroom board.
A display board that is 24 inches wide by 36 inches tall is a good starting point for most projects, but you may need a custom display board if your project is very large or complex.
You can assemble your display board very simply with foam core and poster board, but heavier materials usually require heavier frames. For heavier materials, the choice is usually between a tri-fold display board and a wall-mounted display board.
Tri-fold display boards are inexpensive, lightweight, and easy to transport, but they usually don’t offer much support for heavier materials. For thicker displays, you’ll probably need a sturdy metal frame.
The best way to display your project is by tri-folding the poster board.
The tri-fold display board is 11×17 and is 2.5 inches deep. A tri-fold display board can hold 2-3 science projects.
You should place all your project details on the tri-fold board.
You should write in your project title, date, and your grade level.
You can write in project details and results.
You should place your presentation in the center of the tri-fold board facing out.
You can include handouts, information sheets, and any associated materials.
You should add three small pictures in the center of the tri-fold board.
The pictures should be 5.5 x 7.5 and on plain white paper
Size of tri-fold science fair project display board
There are several options for the science fair display board, including tri-fold, tri-fold with portrait mount, and tri-fold with portrait mount and foam core board.
Tri-fold display boards come in various sizes, including 24 x 36 inches, 30 x 40 inches, 36 x 48 inches, and 36 x 60 inches.
The size of the science fair display board that you choose largely depends on the size of the science fair project.
If you display something small, such as a science fair project measuring 12 x 12 inches, then a 24 x 36-inch tri-fold display board may be a good choice.
However, if your science fair project measures 18 x 24 inches, you may need a 30 x 40-inch tri-fold display board.
Tips for choosing from Different Types of Display Boards
There are several types of display boards, each with strengths and weaknesses.
Variable display boards
Variable display boards are the simplest and most affordable. They can be as simple as a corkboard or a sheet of poster board, or they can be more elaborate, with pushpins, thumbtacks, and magnets to hold materials in place.
Variable display boards are useful for short, simple presentations. They can even be used to illustrate simple models, such as diagrams or Venn diagrams.
Oneway display boards
Oneway display boards are a variation on the variable board. Instead of providing multiple surfaces to attach materials, they typically have a single panel on which the materials are displayed.
Oneway display boards are more durable than their variable counterparts. For example, they’re made of heavier paper and can be mounted on the wall. They also tend to have more grommets or holes for hanging, making it easier to hang heavier materials. Oneway boards are often used for more durable materials like posters or blueprints. They’re also useful for presenting complex models, such as diagrams or Venn diagrams.
Pinnable display boards
Pinnable display boards are similar to one-way boards, but with one major difference: They can be pinned. Instead of being mounted to the wall, they’re designed to be pinned on walls. They’re useful for displaying posters and blueprints.
It’s simple: pick the one that’s right for you. Here are the differences among science fair display boards:
Display Boards: Also known as “poster board,” this type of display board will cover your entire wall. Display boards are rigid and don’t fold, so you’ll need a frame. They’re best for hanging, but you can also display them standing.
Poster Boards: Poster boards are thinner, more flexible, and fold smaller than display boards. They’re also easier to hang, but you may have to invest in a frame. They’re great for smaller projects.
Bulletin Boards: Bulletin boards are staples in classrooms, but they’re also useful for science fair projects. They’re sticky-backed and come in rolls. Bulletin boards can be hung on the wall, but they also work well on easels or tables.
Easels: Easels are a common part of classrooms, but they’re also useful in science fair projects. They’re ideal for displaying large projects, and they come in a few varieties, including folding, portrait and landscape.
Table Covers: Table covers are thin, vinyl sheets that can be attached to tables. They’re ideal for table-top displays because they’re easy to put up and remove.
Other Options: You can also hang your display board on the wall, using a frame or a poster frame, and you can display your display board on the floor.
Here are 10 tips for designing a good science fair display board
A science fair display board is the centrepiece of your science fair project. Your display board should clearly define your project and communicate its goals to the judge.
1. Show how you plan to carry out your project. A science fair display board should show how you will carry out your project. Include pictures, diagrams, and sketches along with the written description.
2. Include a budget. Include a budget for the whole project. The budget should include all of the costs, such as materials, labour, and any equipment.
3. Include a list of materials. Include a list of materials needed to carry out your project. Include brand names and retail prices if possible.
4. Use headings and subheadings. Use headings and subheadings to organize your project document.
5. Include a summary. Your summary should clearly describe the scientific problem you address, the steps you took to solve the problem, and what you learned.
6. Include the hypothesis . Explain the hypothesis, or idea, that you tested in your science fair project.
7. Explain the results. Explain the results you obtained.
8. Explain your interpretation . Explain how you interpret your results.
9. Include a bibliography with sources . Include a list of sources you used.
10. Leave room for corrections. Let the judge know if you made any changes or discovered new information during the project.
Here are 6 tips to make the most of your science fair project display board:
1. Pick an interesting display board. The display board is the centrepiece of your display. It should be eye-catching, and it should complement your project. It’s important to be creative here. Try to find something that fits your project theme. If you’re making a volcano, for example, a lava rock display board would be perfect.
2. Keep the display board simple. No rule says your display board has to be a work of art. Please keep it simple, or, at the very least, keep it clean.
3. Use complementary colours. Don’t overwhelm your display board with colours. Ideally, your display board will have a cohesive colour scheme. For example, if your project is volcanoes, your display board might have a warm colour palette.
4. Use contrasting colours. If your science fair display board has a central colour, use complementary colours as accents. For example, if your display board is red, use blue as an accent.
5. Use clear labels. It’s easy to get hung up with fine details, but the last thing you want to do is confuse your audience. Label everything on your display board.
6. Use contrasting fonts. Again, use easy-to-read fonts.
Tips for presenting in your science fair
Nothing is worse than being at the science fair and seeing someone else’s beautiful display. It leaves such a bad taste in your mouth and makes you think, “how could I be that poor?”
Well, I’m here to tell you that it is not as difficult as you think.
It’s especially important that everything you display is to scale. This means measuring your magnifiers and beakers first and marking their dimensions on your cardboard board.
Also, try to bring decorations that compliment your display. For instance, if your display is about solar energy , bring props from nature such as a tree branch or potted plants.
Time is also an issue. Don’t try to squeeze in last-minute projects. Give yourself plenty of time to finish, so you won’t be in a rush to get everything done.
“The first rule of presenting is: keep it simple,” says Jeffrey Palermo, Ph.D., chief scientist for undergraduate STEM education at the National Institutes of Health.
After you’ve spent countless hours tweaking your project, the last thing you want to do is fail to recognize its potential. Palermo recommends keeping the message simple: “If you don’t know what you’re talking about, then your audience won’t either.”
Here are some simple guidelines to keep in mind when you’re presenting your science project:
Keep it short.
A presentation should be no longer than 5 to 10 minutes. Short presentations also allow you to cover more ground, so your audience gets a stronger sense of what you’re presenting.
Keep it simple.
“Those 10 minutes are the most effective 10 minutes that students spend in their science classes,” Palermo says.
Keep it organized.
“A presentation should be a clear, logical flow from one step to the next,” Palermo says. Even if your science fair project is full of twists and turns, keep your audience on track by asking a few questions early and often.
Tell your audience what you’re going to present and why they should care. Sometimes that means repeating yourself.
Why & How to Use Digital Display Boards
For decades, display boards have been a mainstay in science classrooms, but in recent years, especially after the Corona impact, they’ve also become popular outside of schools.
This shift has occurred due to three factors.
First, technology has made it easier to create high-quality display boards, which has led to a sharp increase in demand for the technology.
Second, displays can be used for various purposes beyond school, including business presentations, trade shows, and museum exhibits.
Third, digital technology makes presentations more interactive and accessible to a wider audience.
As the demand for display boards has increased, so too have many companies offering digital versions of the boards. Digital display boards are the result of cutting-edge technology, but they’re also easy to use.
Here are some of the reasons why they’re ideal for science classrooms and other parts of an educational program:
• Easy scheduling, editing, and sharing. With digital board software, you can set up your displays in advance, then edit them or add additional content later. There’s no need for physical boards, which take up floor space, and they can be updated easily when new information becomes available.
• Versatile applications. Digital displays can be used for various purposes, from displaying information for students in the classroom to representing data for museum exhibits.
• Easy transportation. Digital displays can be transported easily, so they’re ideal for classrooms that have multiple classrooms. The displays can be set up and taken down quickly, and the software allows minor adjustments to be made on the fly.
• Cost-effective. Because digital displays are digital, they eliminate the costs associated with traditional boards, such as the cost of multiple printing runs.
• Eco-friendly. Digital displays have a smaller carbon footprint than traditional boards.
http://www.chicagostudentsciencefair.org/ – The best place to find information about the Chicago Public Schools Science Fair
http://www.neiu.edu/~sfc/ This webpage gives detailed information about the future CPS Science Fair dates in and around Chicago.
http://www.scifair.org/ How-to guides and tips on science projects created by teachers and former winners, all for your convenience
http://www.newton.dep.anl.gov/aasquesv.htm Argonne National Laboratory is one of the world’s foremost research centers for science, engineering, and technology. The website features over 10,000 questions and answers on various topics in science. The archive of questions has not only helped students find answers for their Science Fair projects but it also provides information to teachers who are looking for reliable sources.
http://www.acs.org/ American Chemical Society is an educational resource designed for the teaching of chemistry and chemistry related projects.

Leave a Reply Cancel Reply
Your email address will not be published. Required fields are marked *
Name *
Email *
Add Comment *
Save my name, email, and website in this browser for the next time I comment.
Post Comment
Get organized. Stay creative.
Milanote is an easy-to-use tool to organize your ideas and projects into visual boards.

Collect everything in one place

Write notes & to-do lists
Simple text editing and task management make it easy to add your thoughts to a board.

Upload images & files
Milanote supports all common file types including JPGs, PDFs, Word, Excel, common design files and many more.

Save text, images & links from the web
The Milanote Web Clipper lets you save inspiration and ideas from any website with a single click.

Add notes & photos from your phone
Anything you save in the Milanote app will be ready to organize as soon as you're back at your computer.
Organize visually

Collaborate with your team

Designers use Milanote to organize their projects

Creative directors use Milanote to organize their inspiration into moodboards

Marketers use Milanote to organize their campaigns

Writers use Milanote to outline their stories

Agencies use Milanote to organize their creative projects

Startups use Milanote to figure out what's next

Creative professionals from these companies use Milanote

Try Milanote today
Free with no time limit
7 Choice Board Examples to Bring Into Your Classroom

Choice boards give students the freedom to decide on learning activities that interest them and they're perfect for learning in-class or at a distance.
In this post we'll explore what choice boards are, how to make a choice board, some example choice boards and more! Let's dive in.
What is a choice board?
Choice boards are graphic organizers that empower your students to take an active role in their learning by choosing the activity or activities that they are going to complete. These boards can be physical or digital and include different activities around a particular subject area for students to complete in a given timeframe. While as the teacher you select all the possible activities, your students are given the choice to pick from the list to decide how they want to continue engaging with the lesson.
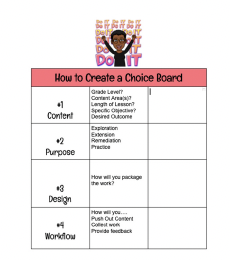
How to make a choice board
There is no one right or wrong way to make a choice board and thankfully there are a ton of great examples to help inspire your creativity. That being said, here are a few guiding principles to help get you started:
- Determine the purpose of your choice board
- Align your choice board with specific learning outcomes
- Select activities for your choice board that fit your learning outcomes
- Determine your choice board rules including the number of activities to be completed and if there are any must-do activities
- Select your choice board layout and style
- Put your board together
It’s also important after using a choice board to make time to reflect afterward to see if there are any changes or improvements you want to make for the next time you use a choice board in your classroom.
Choice board examples
There are a lot of ways to set up a choice board for remote learning, depending on how creative you want to be and how much time you have.
Below are 7 choice board examples ranging from short and simple to ultimate creativity.

Bitmoji Virtual Classroom
"Most teachers I know use Google Slides to make choice boards. There are lots of fun templates out there", says Carrie Willis, Technology/STEAM Director from Redlands, CA., "plus, it is fun to add bitmojis to the boards!"

Google Slides are a great option for choice board examples when you want to get creative. If you're not familiar with Google Slides, they work just like Powerpoint, but are all online, so you can easily share it with your class. Google Slides allow complete freedom to get creative with your theme and add your own backgrounds, images, and add links to anywhere.
Virtual Makerspace Choice Board

"I like Google Slides because it's directed while also giving students freedom. It's very contained and students can't click out to something else," said Ms. Miller. Read Ms. Miller's tips for creating a virtual makerspace choice board here .
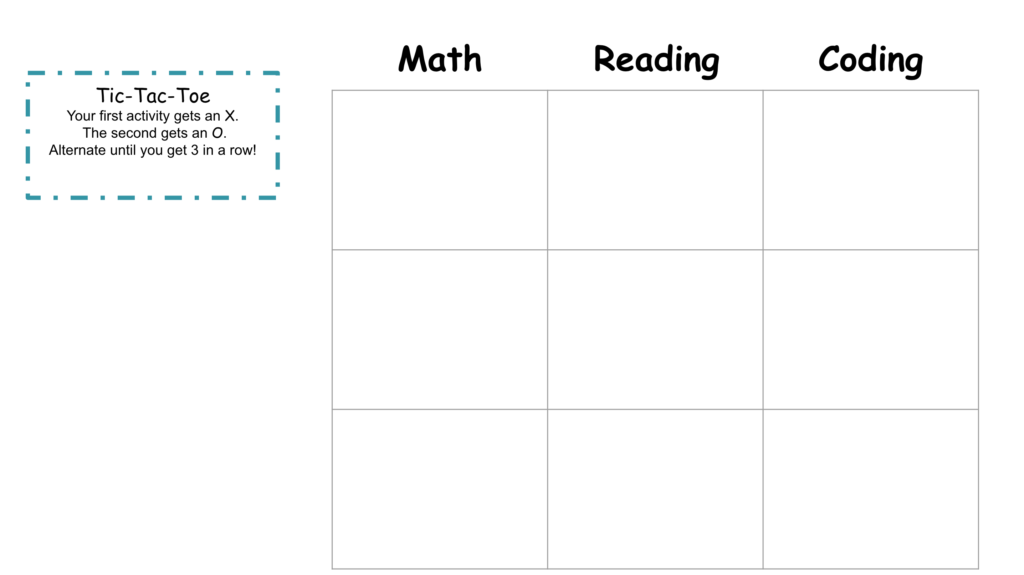
Tic Tac Toe Choice Board

How to make a choice board with Google Slides
Step 1. outline your ideas.
Get started by mapping your ideas on paper. Think about what theme or learning goals you want your board to center on.
Step 2. Decide what activities you want to include.
Try to include a mix of activities that your kids are familiar with, but also some new items too. You can always change it up later.
Step 3. Sketch it on paper
Think about the way you want to organize information. The way your board is organized helps students find an activity to meet their learning goals quickly. Here are some ideas:
- Activity type - robotics, coding, drawing, building
- Learning concept - counting, reading, science
- Theme - outside, animals, oceans, space, family
- "Virtual classroom" with activities are organized like they would be in a real room
Step 4. Make the Choice Board Slide
When you're ready, set up a slide with the same layout that you sketched on paper. Add text boxes to label each of the areas or activities. To add a text box, go to "Insert" then "Text box". I used a table to make my tic-tac-toe board.
Give your students direction by adding images they're used to seeing. They'll know what to expect when they click on the activity if they see the app icon, character, or book cover they already know.

PRO TIP! You can search for images to add to your choice board directly inside Google Slides.

Finally, add links to each of your activities by selecting the images, then clicking the insert link button on the menu.
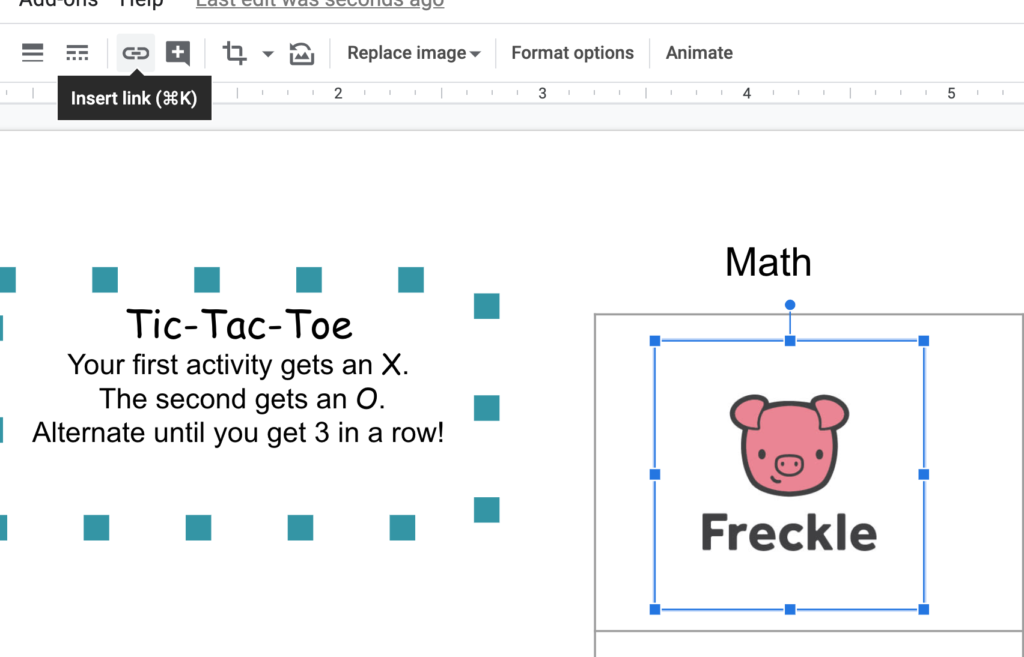
When you're finished, you can share the link to your slides with your class, or you can save the slide as a PDF and all the links will be clickable.
All About Dinosaurs Seesaw Choice Board
Seesaw is a great place to add your choice board so that you can easily collect student responses and your kids can easily interact with the activities.

Seesaw's Community library has tons of choice board examples for you to choose from. The example above focuses on dinosaurs and allows students to decide what part of the dinosaur they want to learn about, as well as what activity they want to do. Then, students are required to label each part of the dinosaur to demonstrate their knowledge, all within the Seesaw activity.
How to embed links in a Seesaw activity
In my tic-tac-toe example from Google Slides, I could export the final design as a PDF, then upload it to Seesaw and all the links would still work for my students to click on. See how here . See more Seesaw choice bard examples that include links here .
Kodable Bingo Seesaw Choice Board

Bingo is another style of choice board that is easy to use with your students. Samantha Selikoff, technology teacher in New Jersey shared her design for Kodable Bingo earlier this summer. Using the Seesaw activity creator, it is easy to create the bingo design for kids to complete on their own.
Step 1. Create the bingo board in Word, Google Docs, or any editing tool you're comfortable with. Perhaps give Google Slides a try!
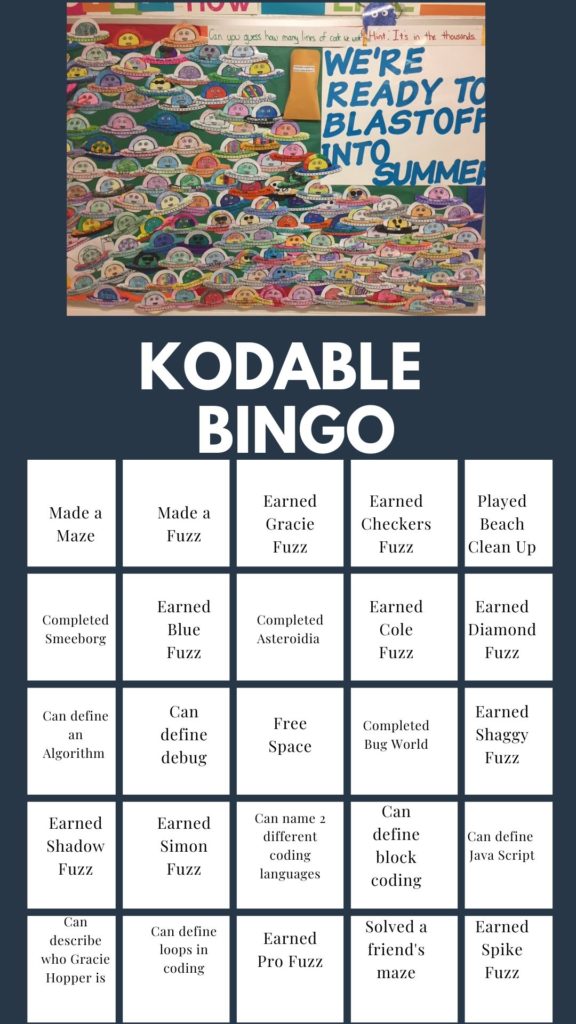
Step 2 Take a screenshot and add it to your Seesaw activity using the image upload option.
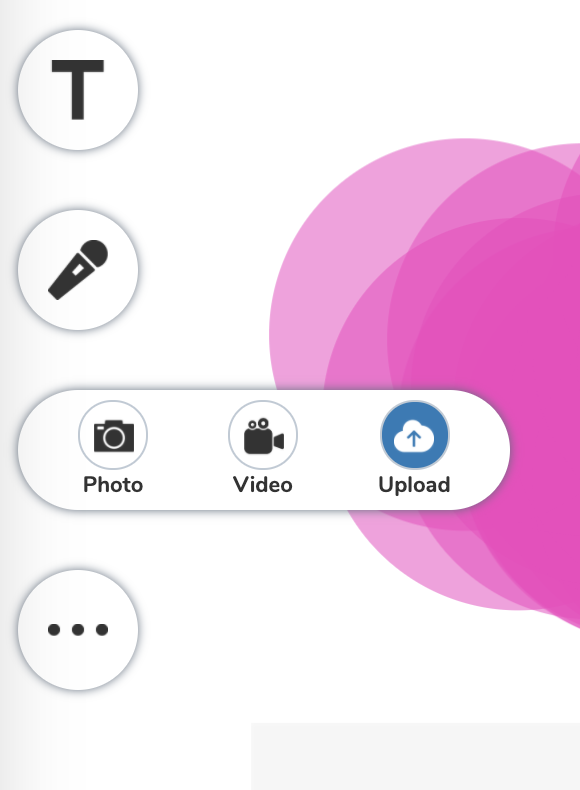
Step 3 Add dauber shapes for students to add to their completed board.
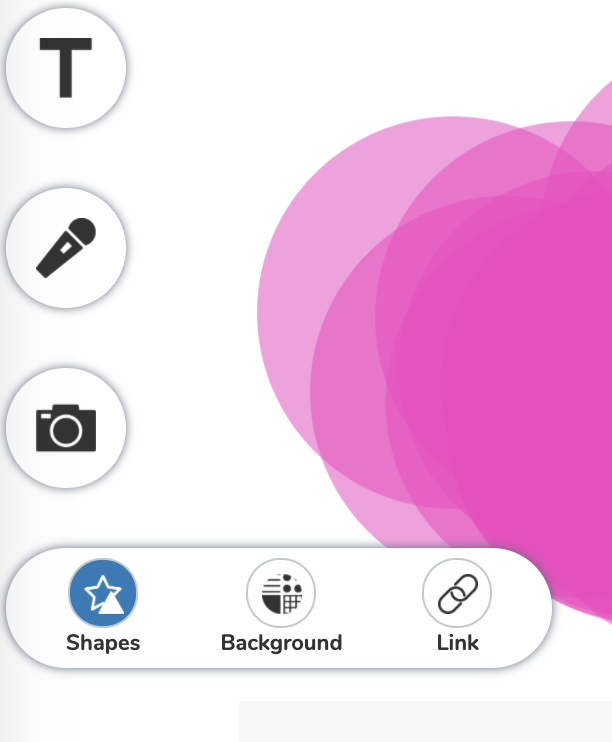
Change the color and transparency by using the styling tools below the shape. Duplicate the shape 10-15 times.

Symbaloo Choice Board
If you're looking for a simple solution to direct student learning. Symbaloo is a fast and easy way to set up choice boards for remote learning this school year.
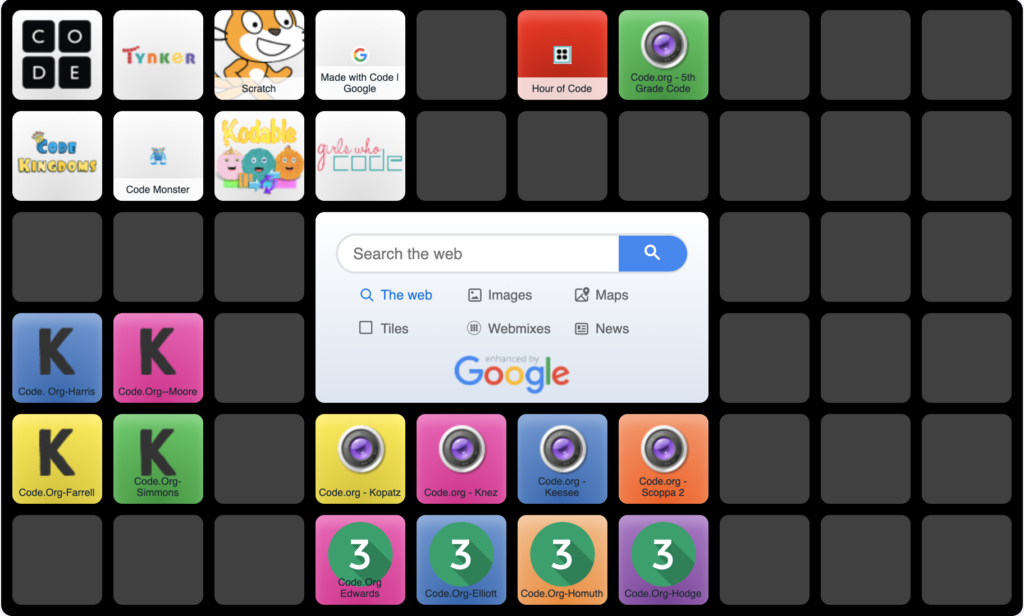
The no-frills interface uses a simple grid, but also allows customizations like backgrounds and custom colors. You can add links to all your relevant activities as bookmarks or shortcuts for your class.

It is important to think about how you want to organize the information on your choice board so that it is easy for a student to figure out where to go. Both teachers chose to include sections for each of their classes in the above examples, while also including a section that links to the "approved" activities directly.
Learn more about using Symbaloo for your remote learning choice boards in their instructional video here .
Choice board template
As you can see from the examples above, there are a lot of choices for you to make for your own choice board! Thankfully there are a lot of great choice board templates available online for you to help you get started faster.
Here are a few online resources that provide choice board templates:
- Slides Mania offers free Google Slides templates
- Teachers Pay Teachers has over 1,600 choice board templates to choose from starting at $1
- Elkhart Community Schools has also curated templates for spreadsheets and google docs
Frequently asked questions about choice boards
What are the benefits of using choice boards in the classroom.
Using choice boards in the classroom offers several benefits including:
- Increasing student engagement
- Promoting differentiated instruction
- Improving student motivation
- Promoting creativity and problem-solving skills
How many choices should be on a choice board?
The number of choices you give on a choice board should give students the opportunity to feel like they have a choice in their activity without overwhelming them with too many options. This will depend on the type of choice board you are using as well. For example, a tic-tac-toe choice board will have nine choices while a bingo choice board will have 25 options available. When in doubt, use less choices to start and see how students respond before adding in additional options.
How do you implement choice boards in the classroom?
Just like with any classroom activity, choice boards should be implemented by clearly explaining guidelines and expectations for students to follow. This includes the activity options, the timeframe allowed, and any other specific requirements including cleanup or turn in responsibilities. After the activity starts be sure to monitor progress and support any students who need assistance. Finally, once your choice board activity is done give students (and yourself) a chance to reflect on activity.
Choice boards are a great classroom resource for you to empower your students to take an active role in their own learning. Plus, they are so much fun for everyone! If you’re looking for more fun and educational classroom activities try out Kodable’s free educator plan to help your students learn the basics of computer programming. It also makes for a great choice board activity!
Kodable Education has everything you need to teach kids to code!
In just a few minutes a day, kids can learn all about the fundamentals of Computer Science - and so much more! With lessons ranging from zero to JavaScript, Kodable's suite of learning apps help prepare children for a digital future.
- PRO Courses Guides New Tech Help Pro Expert Videos About wikiHow Pro Upgrade Sign In
- EDIT Edit this Article
- EXPLORE Tech Help Pro About Us Random Article Quizzes Request a New Article Community Dashboard This Or That Game Happiness Hub Popular Categories Arts and Entertainment Artwork Books Movies Computers and Electronics Computers Phone Skills Technology Hacks Health Men's Health Mental Health Women's Health Relationships Dating Love Relationship Issues Hobbies and Crafts Crafts Drawing Games Education & Communication Communication Skills Personal Development Studying Personal Care and Style Fashion Hair Care Personal Hygiene Youth Personal Care School Stuff Dating All Categories Arts and Entertainment Finance and Business Home and Garden Relationship Quizzes Cars & Other Vehicles Food and Entertaining Personal Care and Style Sports and Fitness Computers and Electronics Health Pets and Animals Travel Education & Communication Hobbies and Crafts Philosophy and Religion Work World Family Life Holidays and Traditions Relationships Youth
- Browse Articles
- Learn Something New
- Quizzes Hot
- Happiness Hub
- This Or That Game
- Train Your Brain
- Explore More
- Support wikiHow
- About wikiHow
- Log in / Sign up
- Education and Communications
How to Create a Science Project Display Board
Last Updated: April 4, 2024 Fact Checked
This article was co-authored by Bess Ruff, MA and by wikiHow staff writer, Jennifer Mueller, JD . Bess Ruff is a Geography PhD student at Florida State University. She received her MA in Environmental Science and Management from the University of California, Santa Barbara in 2016. She has conducted survey work for marine spatial planning projects in the Caribbean and provided research support as a graduate fellow for the Sustainable Fisheries Group. This article has been fact-checked, ensuring the accuracy of any cited facts and confirming the authority of its sources. This article has been viewed 69,332 times.
When entering a science fair or completing a science project for a class doing the experiment is just the first part. Once you have finished your experiment, you will have to display the work you did and the results that came from that work. The typical science experiment is displayed on a white tri-fold board and includes many sections. Proper placement of the sections is crucial to the success of your board.
Deciding What Information to Include

- A good title might be “Volcanic Explosions” as opposed to just “Volcanoes.”
- When you can, use vivid, specific titles like “Bioluminescence in Crystal Jellyfish” in place of generic titles like “Glowing Jellies.”

- Follow the guidelines of the assignment or fair to know if you need an abstract or a hypothesis section.
- A hypothesis must accurately describe what is to be tested in the experiment, and what the expected outcome is. For example, a statement such as “The baking soda will react with the vinegar in a neutralization reaction, evolving gases and building pressure inside the volcano replica. This pressure will cause fluid to spew from the top of the replica.”

- Cite previous experiments that indicate that there is a reason to expect the results that your hypothesis predicts. For example, you could cite a lab experiment that states that acids and bases give off gas when they neutralize each other to support the hypothesis that baking soda and vinegar will go through such a reaction.

Organizing the Information

- All fonts should be easily readable. If the font is too small or unclear, this will discourage people from reading the information.
- Use bullet lists, multiple paragraphs, and white space on your board to avoid an overwhelming amount of text.

- If you prefer not to use glue, it may sometimes be acceptable to tack items to the board.
- Double sided tape is a good way to stick on things that do not stick well with glue.
Going Above and Beyond

Community Q&A
- Use a paper cutter to make sure of straight cuts. It improves neatness a great deal. Thanks Helpful 0 Not Helpful 0
- Use plenty of graphs and pictures on your project. Thanks Helpful 0 Not Helpful 0
- When typing titles/descriptions, use larger fonts, especially for titles. Thanks Helpful 0 Not Helpful 0

- Do not bring any dangerous materials (strong acids/bases, etc.) for display. Thanks Helpful 5 Not Helpful 0
Things You'll Need
- Display Board (Tri-fold preferably)
- A computer with word processing and printer
- Glue stick or double-sided tape
- Paper cutter (optional, if not using, replace with scissors)
You Might Also Like

- ↑ https://www.sciencebuddies.org/science-fair-projects/science-fair/science-fair-project-display-boards
- ↑ https://www.stevespanglerscience.com/2012/01/30/science-fair-911-display-boards/
- ↑ https://www.sciencebuddies.org/blog/top-ten-tips-project-display-board
- ↑ http://www.sciencebuddies.org/science-fair-projects/project_display_board.shtml
- ↑ http://www.sciencebuddies.org/science-fair-projects/project_display_board.shtml#materialsandconstructiontechniques
About This Article

- Send fan mail to authors
Reader Success Stories
Community Review
Jan 24, 2023
Did this article help you?

Jaithan Lewis
Mar 13, 2023

Featured Articles

Trending Articles

42 Awesome Interactive Bulletin Board Ideas for Your Classroom
by Sara Ipatenco
Bulletin boards are a great way to post important things. Teachers utilize bulletin board space to hang academic materials, learning resources for students, or notices and calendars to keep parents updated about what’s happening in the classroom. Interactive bulletin boards can be used for so much more! Create an interactive experience for your students to encourage them to practice new skills and stay fully involved in their education.
Interactive bulletin boards
1. make a sorting station.

Give your students a quick and easy way to practice a skill you’ve been working on in the classroom through sorting. Younger children can sort things by color or size while older students can sort math problems or animals who live in different habitats.
2. Create a matching game

Have your students match math problems to their answers, spelling words to their phonics sounds, or states to their capitals with an interactive matching game posted on a bulletin board.
3. Give students a game to play

Set up a bulletin board with a giant game board, such as sudoku. When students have a few minutes of free time they can make a move on the board.
4. Keep track of travels

This is a great bulletin board for social studies teachers. Put up a map of the United States or the world and have students add pictures or small tokens when they travel to a new place. Use the bulletin board to learn about important landmarks or historical events.
5. Encourage students to wonder

Hang up a sign that says, “I Wonder…” and encourage students to write down questions they have in response to what they are learning. Perhaps they will wonder about something they read, or a concept presented in science. Maybe they will wonder about an event in history or a current event. Periodically, you can read through them as a class and discuss them.
6. Make a giant coloring book

Coloring has been proven to lower stress and increase happiness, so why not create a huge coloring book for your students? Students can color when they have a few spare minutes, or they can take a break to go color if they feel stressed.
7. Make life size math boards

Turn a bulletin board into a giant math resource board. Create a giant multiplication chart or a huge hundreds chart. Students can reference the boards when they are a practicing their math facts. Make it even more interactive by covering up a number or two to see if students can figure out what’s missing.
8. Encourage kindness and recognition

Have students give each other shout-outs with a bulletin board that gives them space to hang up compliments to each other. Not only will you be creating a culture of kindness, but students will be competing to compliment their peers.
9. Play I Spy

Hang a random collection of items on interactive bulletin boards and create a list of things to find. You might include things that start with a certain letter or are shaped a certain way. Give students a list of things to find and let them see how many they can locate.
10. Make a giant wordsearch

Encourage your students to find phonics sounds, spelling words, or vocabulary words with a huge word search. It is an important skill to be able to find these things in context, and a word search is a fun way to practice.
11. Use a Venn diagram

Reinforce the concept of compare and contrast with a giant Venn diagram. Students can add their thoughts about how two different things, such as biomes, books, or places, are the same and different.
12. Have a tournament

Like March Madness or the NFL playoffs, students can fill in brackets with favorite movies or books. Students should be prepared to defend their choices.
13. Encourage deep discussion

Hang up a “Would You Rather” bulletin board. Once students have chosen their answer, the class can discuss the pros and cons of each choice. Then you can change the question and have another conversation!
14. Use QR codes

Create a mystery type bulletin board with QR codes. Students can scan the QR code to get clues to answer questions or they can simply give kids some in-depth information about people, places, or things you’re studying in the classroom.
15. Motivate your students

Do you want students who are healthy, happy, and motivated to learn? Use a bulletin board to hang up rip-off motivation posters. Each slip that gets ripped off will give students a life tip to help them make healthy food choices, exercise more, improve their grades, or get along better with their peers.
16. Make math interactive

Hang up a few challenging math problems that go with concepts you’re teaching in the classroom. When students have a few minutes of free time, they can work on figuring out the answers.
17. Make the students think

Hang up some boxes that look like French fry containers to encourage students to come up with new ideas and think outside the box. Students might fill the boxes with alternatives to overly used words or fill them with synonyms or antonyms. This is a great way to build your students’ vocabulary! Interactive boards are great for reinforcing learning in fun ways.
18. Incorporate music

Encourage your music students to recognize notes, beats, chants, lyrics, and songs by hanging up rhythms or snippets of songs. Students can play the snippets on a musical instrument or tap out the notes to see if they can guess the mystery song.
19. Make a mistake

Put a problem on the bulletin board that contains a mistake. Students can work the problem to see if they can find the mistake. You can also try this with lists of words, misspelling some of them and seeing if students can find them.
20. Encourage reading

Entice your students to learn more about something or someone by making flaps on your bulletin board. Write just enough on the front of the flap to interest them. Students must lift the flap to learn more.
21. Recommend new books

Provide students with rectangles that will act as book spines or book covers. As they read books they really enjoy, they can write the title on the spine or draw the cover picture. Create a bookshelf on the bulletin board so students can find their next good book based on the recommendations of their peers.
22. Do some graphing

Have students put together a bar graph by graphing the letters of their name, their favorite kind of weather, or their favorite foods. Once the graph is made, your students can interact with their peers’ responses by asking a series of questions.
23. Give your students a quiz

Hang a few clues about something you’re learning in class, such as famous people or simple machines, and then have students figure out what is being described in the clues. Not only is this a great way to reinforce concepts, but it can take the place of a traditional pencil and paper quiz.
24. Make a timeline

Create an ongoing bulletin board that starts at the beginning of a unit, such as the history of America or the addition of states to the country. As students learn new facts and dates, they can add them to the timeline. When it’s finished, the bulletin board will serve as a great way to study for a test.
25. Hold a vote

Instead of simply writing choices on a slip of paper, create a voting booth on a bulletin board. Hang a box on the board and provide students with ballots to put in the box. Give students information about their voting options by hanging pictures and facts on the bulletin board near the ballot box.
26. Get to know each other

Play a guessing game to get to know each person in the class. Have students create an image of themselves with a mask on (medical or otherwise!). Students will include a few facts about themselves. The kids can read the clues and see if they can match each person up with a friend in the class.
27. Go out to eat

Create a restaurant menu on a bulletin board so students have a fun way to practice counting and adding money. Students can select from the menu and figure out how many dollars, quarters, dimes, nickels, and pennies it would take to buy those items. Do a similar activity with a toy store or hardware store instead.
28. Give them the answer

Think up a problem, but instead of giving that to students, give them the answer instead. Then students will see if they can come up with the question to go with the answer.
29. Challenge them

Give your students a series of challenges to meet. Perhaps they need to find specific answers from a book you’re reading together or several tasks to figure out the solution to a science inquiry.
30. Guess the historical figure

Hang up a picture and/or a set of clues about people you are studying in history or social studies. Students will read the clues and then use their resources to find out the identification of each person, as well as more facts about that person.
31. Identify differences

Stretch your students’ learning by seeing if they can tell the difference between two things, such as poems vs. songs or books vs. movies. Create a set of flaps. Put the clue for each item on the outside of the flap and the correct answer on the inside. Students can make their guess and then lift the flap to see if they were correct.
32. See what you can find

Practice things such as location words and prepositions by creating a scene on your bulletin board. Hang the location words and then hide something around the scene. Students will describe where the item is located using the words on the bulletin board.
33. Spread some love

Celebrate Valentine’s Day or World Kindness Day by hanging the word “love” on a bulletin board. Provide students with markers and let them fill the board with as many ways to spread love and kindness as they can think of. Other students will be inspired when they read all the ideas.
34. Find some new friends

Set up a pen pal program with your students and students from schools in around the country or around the world. The students can exchange post cards that you can hang on a bulletin board. Students can locate where the postcards come from by looking at a map. Exchanging letters also helps students practice writing and spelling.
35. Share what you learned

Choose an article and read it together as a class. Hang the article on a bulletin board and have students write down something they learned to add to the board. As students look at the board, they might just learn something they didn’t pick up on when they read the article.
36. Share thoughts and feelings

Give students blank papers to fill in their thoughts about certain topics. They can complete an inspirational sentence or share how a book made them feel. The other students can gain inspiration or learn new things from the thoughts of their peers.
37. Share goals

Ring in the new year by having students write their goals for the coming year on an interactive bulletin board. This would also be a great activity for the start of the school year. Students can write down what they want to learn over the course of the year or things they want to improve upon before summer break.
38. Let students self-monitor

Hang up some envelopes or file folders with labels allowing students to tell you how well they understand what they are studying. Students can place their work in the corresponding spot. Students who feel like they completely understand can put their work in the envelope labeled “I’ve got it!” while other students might use the envelopes saying, “I’m doing OK” or “I need more help.” This allows you to quickly gauge who needs more help from you.
39. Make a BINGO board

Hang up a grid with several different tasks, such as a writing prompt or book to read, and challenge students to fill in the board. Once students get five in a row (or a blackout!) they can receive a prize or some type of recognition for their efforts.
40. Study current events

Invite students to bring in news articles or pictures of events happening around the world. They can share what they brought and then you can add it to the bulletin board for other students to also read.
41. Plot locations from books

Hang up a giant map on a bulletin board. Give students small stickers and have them place them in the locations they read about in books. They can also hang stickers in places you learn about in social studies.
42. Ask a thought-provoking question

Write a question on a bulletin board and leave plenty of space for students to write their answers. The kids can use markers to add their thoughts and answers to the board.
The only limit to creating an interactive bulletin board is your imagination! Inviting your students to interact with what they’re learning about is a sure way to ensure that they remember that information long into the future.

TREAT YO' INBOX!
All the trending teacher stories, resources, videos, memes, podcasts, deals, and the laughter you need in your life!
- Grades 6-12
- School Leaders
Get 50% off your first box of Home Chef! 🥙
700+ Brilliant Bulletin Board Ideas for Every Grade and Subject
Your school walls will never be the same!

Some teachers absolutely love putting up new bulletin boards, while others find it all a bit of a chore. Whichever type you are, you’re sure to find something new worth trying in this enormous list of bulletin board ideas!
Monthly Bulletin Board Ideas
Bulletin board ideas by subject and theme, seasons and holidays bulletin boards, even more bulletin board ideas.

You don’t have to change out your bulletin boards monthly of course, but it can be nice to have something new for kids to look at on a regular basis. Here are clever ideas for every month of the year.
- 18 January Bulletin Board Ideas To Welcome In the New Year
- 18 Creative February Bulletin Board Ideas
- 21 Fun Bulletin Board Ideas for March
- 20 Inspiring April Bulletin Boards for Classrooms
- 16 Uplifting May Bulletin Boards for Classrooms
- 15 June Bulletin Board Ideas To Brighten Your Classroom
- 15 Fantastic July Bulletin Board Ideas To Make Your Classroom Pop
- 25 August Bulletin Boards To Kick Off the Year
18 September Bulletin Boards To Start the Year Off Right
- 30 Brilliant Bulletin Boards To Try This October
- 17 November Bulletin Boards To Celebrate the Season
- 18 Festive Bulletin Board Ideas for December
Seasonal boards are terrific for helping young students learn about the different seasons. And holiday boards are always lots of fun!
50 Fantastic Fall Bulletin Boards and Doors for Your Classroom

Leaves are changing, there’s a chill in the air—embrace the feeling of fall with these welcoming boards.
21 Winter Bulletin Boards To Celebrate the Season

The weather outside might be frightful, but these bulletin boards are delightful!
30 Spring Bulletin Boards To Brighten Your Classroom

When flowers begin to bloom, spring has finally arrived. Freshen up your boards to match the mood.
40 Delightful Summer and End-of-Year Bulletin Boards

Summer means sunshine, warm breezes, and, of course—vacation! Build up the excitement with some cheery bulletin boards.
22 Spooktacular Halloween Bulletin Boards and Door Decorations

The spooky season offers lots of cool ideas for bulletin boards, and this list will send shivers down your spine!
17 Thanksgiving Bulletin Boards and Door Decorations to Celebrate Gratitude

You’ll be incredibly thankful for this roundup of ideas, perfect for your November classroom.
18 Sweet Valentine’s Day Bulletin Board Ideas for the Classroom

Love is in the air, and these sweet bulletin boards will help celebrate it!
20 Inspirational Bulletin Board Ideas for Black History Month

It’s important to take every opportunity to celebrate diversity, including in your classroom decor and bulletin boards.
10 Amazing Bulletin Boards That Celebrate Women’s History Month

March is Women’s History Month, so use it to inspire the girls of today to become the leaders of tomorrow.
Whether you use your bulletin boards to reinforce important concepts, or just want them to match your classroom theme, you’ll find inspiration here.
20 Math Bulletin Boards That Make Learning Fun

Decorating your math classroom is easy as 1, 2, 3 with boards like these!
Free “Change Your Words, Change Your Mindset” Bulletin Board Kit for Your ELL Classroom

English-language learners will appreciate this growth-mindset-themed board. It encourages them to use positive words, in any language.
Free Wheel of Phonemes Bulletin Board Kit

Mastering phonemes helps kids learn to read more quickly. This free printable board provides excellent reference tools for understanding this concept.
20 of the Best Science Bulletin Boards and Classroom Decor Ideas

Chemistry, anatomy, astronomy, physics, biology, ecology—science has so many ideas to explore, just like this list.
25 Best Bulletin Boards To Celebrate Reading

When you teach kids to love reading using boards like these, you open up a whole new world they can enjoy for the rest of their lives.
30 Rainbow Bulletin Boards To Brighten Your Classroom

Bring color and creativity to your classroom, and a dash of Pride too!
10 Amazing Pac-Man Bulletin Boards for Your Classroom

Go retro with these cute boards celebrating Pac-Man and his ghost friends.
8 Star Wars Bulletin Boards That Are Out of This World

“Baby Yoda” taught a whole new generation to love this franchise, and the force is definitely with these bulletin boards!
Teachers are always coming up with incredible new ways to make their boards shine. Take advantage of their ideas in your own classroom!
41 Interactive Bulletin Boards That Will Engage Students at Every Level

Turn a bulletin board into a learning experience! Make it a game, a coloring nook, and more with these smart designs.
101 Back-to-School Bulletin Boards From Creative Teachers

Set the tone for a year of learning and fun when you dress up your boards like these fun examples.
Free Bulletin Board Kit That Teaches Students to “Think Like an Inventor”

What could be easier than a board you simply print, cut out, and post? Hit the link to grab your free kit.
Printable Free Emotions Bulletin Board Kit for Your Classroom
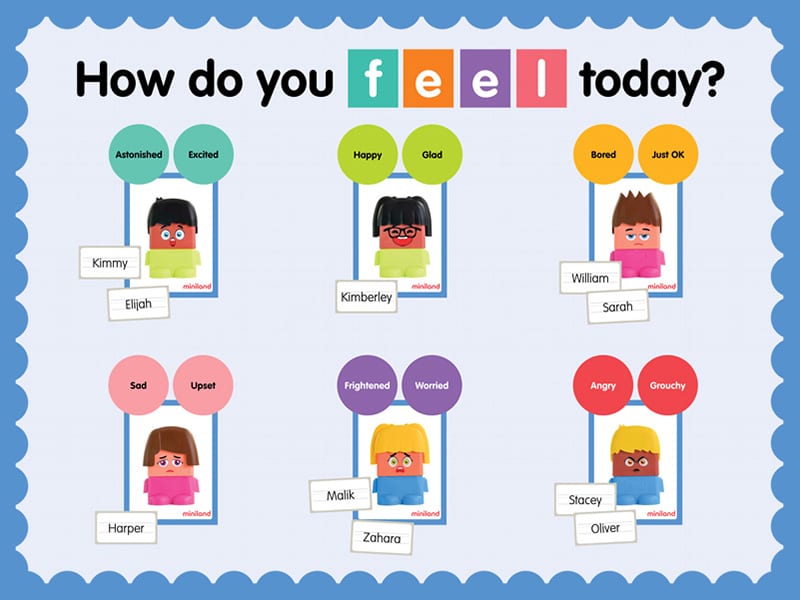
Here’s another freebie, ideal for teaching kids about emotional regulation.
Free Printable Pencil Alphabet for Bulletin Boards and More

Use these pencil letters to spell out just about anything, and you’ll have a snazzy new board in a flash!
Looking for more? Check out these 30 Inspiring Classroom Themes and Ideas To Match Any Teacher’s Style.
Plus, get all the latest teaching and learning news, straight to your inbox, when you sign up for our free newsletters .

You Might Also Like

Apples and school buses and scarecrows ... Oh, my! Continue Reading
Copyright © 2024. All rights reserved. 5335 Gate Parkway, Jacksonville, FL 32256
Work Organizer and Assigner ™ Magnetic Dry-Erase Whiteboard Systems
Lots of work to assign assemble, prioritize and assign tasks, then track and control them. this shows assignee availability, work load, and status for successfully predicting time results. 4 board sizes for 9 to 44 assignees.
Post job information on the optional big magnetic 1" x 8" cardholders. The 5 cardholder and 10 card colors give you up to 50 color-combination codes to show type, priority or your color-codes quickly categorize, locate and cut reading time. Organize and prioritize them in the left hand column, then move them under the name of the task assignee. Includes a card-keying template for fast, neat preparation of the job data in the cardholders. The assignee's 7-row blocks can also be used for locations, work stations, days, shifts or weeks, etc. Write directly on the dry-erase whiteboard too.
To display documents on these boards, See Magnetic ChartJackets ® .

Price Chart - Order Here
| Assignees | Tasks per Name | Board h x w | with Magnets & Dry-erase Tools | with Dry-erase Tools | ||
|---|---|---|---|---|---|---|
| 9 | 7 | 3' x 4' | ||||
| 20 | 7 | 4' x 6' | ||||
| 28 | 7 | 4' x 8' | ||||
| 44 | 7 | 4' x 12' | ||||
Related Products

5 ways to help families foster STEM learning
When students engage in STEM at home, they deepen their skills and build real-world connections. Learn five ways you can help families support STEM learning.

By Melissa Thompson, MS
Published September 17, 2024
STEM education helps kids build skills like critical thinking, creativity, and problem-solving. But STEM activities don’t just belong in the classroom. When kids work with STEM content at home, they can develop these skills even further. Plus, they can understand how STEM applies to everyday life.
As an educator, you can help families encourage and engage in STEM learning at home. And by partnering with families, you can provide consistent support for students who learn and think differently. Use these tips to get started.
1. Share STEM resources with families.
You probably already share classroom information with families through email, a newsletter, or a website. Consider creating a special section for STEM news.
Share information about STEM projects that you’re doing in the classroom. Add discussion questions and extra resources that families can use at home. If you’re using a digital platform, make sure you can share documents that families can download. Have printed versions available for them, too.
2. Host STEM workshops.
Host in-person or virtual STEM workshops to build strong partnerships with families. Talk about the content you’re teaching in the classroom and have families engage in some of the activities. Address any questions and misconceptions families might have.
Give families practical tips for building STEM skills at home. And share the strategies you use to help all students access STEM content.
3. Make learning goals clear.
As educators, we often map out our content using a curriculum pacing guide. Create a simplified version of this pacing guide to share with families. Make sure that students and families understand the learning goals you’ve set.
Be sure that families have the information they need to support their students at each step of their learning journey. The first two tips above can help with that.
4. Use choice boards.
Choice boards can be a fun homework or afterschool activity to encourage STEM practice at home. Explain choice boards to families and encourage them to have students use them. Make sure that any materials needed are basic household items. Or have students take home materials from the classroom.
The activities can include multisensory approaches like storytelling, creating models, or acting out a concept. Here are a few ideas:
Create a video to share a solution to a common household problem
Write a short story about a STEM topic
Make a simple invention out of household materials
Try designing boards for students using a tool like this choice board generator .
5. Create STEM kits to use at home.
Extend STEM learning by creating toolkits for students to use at home with their families. Fill the kits with items that allow exploration of in-class topics. Make sure to include materials for engineering challenges. Above all, the kits should be fun for kids and families.
You can create these kits from scratch or find premade kits from organizations like STEMChests . You can also partner with organizations that distribute STEM kits as part of their outreach, like the Civil Air Patrol STEM Kit Program .
Partnering with families is a great way to deepen student engagement in STEM. Explore more resources about family engagement:
Learn what research says about family engagement and student success .
Get tips for building relationships with families .
Share this podcast episode about STEM learning at home with your students’ families .
Explore related topics
How to break down communication barriers between teachers and families.

Conversation starters for teachers to use with families
6 strategies for partnering with families of English language learners

We use essential cookies to make Venngage work. By clicking “Accept All Cookies”, you agree to the storing of cookies on your device to enhance site navigation, analyze site usage, and assist in our marketing efforts.
Manage Cookies
Cookies and similar technologies collect certain information about how you’re using our website. Some of them are essential, and without them you wouldn’t be able to use Venngage. But others are optional, and you get to choose whether we use them or not.
Strictly Necessary Cookies
These cookies are always on, as they’re essential for making Venngage work, and making it safe. Without these cookies, services you’ve asked for can’t be provided.
Show cookie providers
- Google Login
Functionality Cookies
These cookies help us provide enhanced functionality and personalisation, and remember your settings. They may be set by us or by third party providers.
Performance Cookies
These cookies help us analyze how many people are using Venngage, where they come from and how they're using it. If you opt out of these cookies, we can’t get feedback to make Venngage better for you and all our users.
- Google Analytics
Targeting Cookies
These cookies are set by our advertising partners to track your activity and show you relevant Venngage ads on other sites as you browse the internet.
- Google Tag Manager
- Infographics
- Daily Infographics
- Popular Templates
- Accessibility
- Graphic Design
- Graphs and Charts
- Data Visualization
- Human Resources
- Beginner Guides
Blog Graphic Design 8 Storyboard Examples For Your Next Big Idea
8 Storyboard Examples For Your Next Big Idea
Written by: Tobi Ojenike Sep 18, 2023

Before making a video for your business, be it a short video, presentation, documentary or a commercial, it is very important to plan your idea and one of the steps in this planning process is to create a storyboard .
A storyboard is a visual tool used to plan and define the visual components of a narrative or project in a variety of creative industries. It is made up of a number of graphic panels or frames that sequentially depict various scenes, shots or sequences.
In this piece, I will be taking you through the process of storyboarding, what should be included in one, how to create one and storyboard templates that you can use to ignite your next big idea.
Click to jump ahead:
Why using storyboards is important
8 storyboard examples for your next big idea, key elements to include in a storyboard, how storyboards fuel creativity across multiple fields .
- 7 Digital storyboarding software to visualize ideas
Storyboard examples FAQs
Create a storyboard in 7 easy steps using venngage.
Using a storyboard is great for so many reasons. You can convey and explain the vision for your video to others with the help of a visual assistance, think of it as a visual communication medium. A storyboard also makes production easier and saves time for everyone involved in the project.
A storyboard is great for streamlining the creative process of your visual project. You can know which shots to make and how to create them when filming. Also, rather than making significant changes while filming, you can collect feedback early on and make straightforward revisions to your storyboard.
Like a script, a storyboard is a visual guide that takes you through the production process of your video. For the purpose of this article, I have put together some storyboard examples beautifully crafted by the amazing designers at Venngage. I am sure they will be useful in fuelling your next big idea. Ready? Let’s go!
Storyboard examples for students
Storyboarding is a flexible tool that students can use to realize their original ideas; it’s not just for filmmakers and animators. Creating a storyboard can help you organize and picture your ideas more clearly when working on a project for class, an art assignment or even a digital presentation.
Students can use them to enhance their storytelling and communication skills, as well as elevate their academic projects and creative minds. Teachers can also use storyboards to create an online course for their students. Here are some simple examples of storyboard examples for students:

Storyboard examples for advertising
Advertising is all about getting people’s attention, conveying an engaging story and motivating them to take action. Some of the most recognizable and successful advertising campaigns you’ve seen use storyboards as their hidden weapon.
Before the cameras start rolling, advertisers can prepare, conceptualize and explain their ideas with the aid of these visual roadmaps.
Storyboards therefore can be used to develop narratives, design images and produce advertising that is memorable and has a lasting impression. Take a look at some examples of advertising storyboards below:

Storyboard examples for short films
Short films are a unique art form. Every frame in it counts in telling a concise and impactful story. The role of storyboards in the production process of a short story cannot be overlooked as they play a pivotal role in the creation of these cinematic gems.
Storyboards help filmmakers in the planning of shots, communication of concepts and realization of their artistic ambitions. Look through some examples below:

Storyboard examples for novels
Have you ever wondered how authors lay out their elaborate plots and characters? Novels immerse us in rich narratives and take us to new realms.
Examples of storyboards for books can be useful in this situation. Authors can organize their literary works using visual narrative strategies, just how filmmakers use storyboards to plot their shots.
Storyboards can enhance storytelling visuals, the writing process and ignite your creative journey, see how below:

All storyboards contain the same information, regardless of whether they are hand-drawn or computer-generated. To give a better idea of what a video should look like, here are the essential elements that should be found in a storyboard:
- Title: The title of the project, the date it was made and other pertinent project details should all be included in the storyboard.
- Panel number: To ensure that the story progresses logically, each page of the storyboard needs to be numbered and the panels need to be placed in the appropriate order.
- Images/drawings: A storyboard’s primary function is to visually represent the action or scenario. Sketches, drawings, photos or any other visual representation that expresses what will appear on screen or in the finished product can be used for this.
- Shot description: Each panel is accompanied by captions or descriptions that give crucial information about the scene’s events. Characters, actions, camera angles and other pertinent visual components are all covered.
- Camera directions: Camera directions may be included for projects in cinema, television or video to help the camera operator. This may entail defining the camera’s movement, framing and angles.
- Dialogue and sound: If the project includes spoken or written text, dialogue or text identifying the speaker and what they are saying or writing should be included in or close to the panels.
- Transitions: Transitions between shots or scenes are frequently noted in the storyboard during the creation of movies and videos. Cuts, fades, dissolves and other visual transitions are examples of this.
- Notes and comments: To give context, explanations or instructions to the production crew, additional notes or comments may occasionally be included. To draw attention to certain requirements or details, utilize these.
- Timing and duration: The length of each shot or scene can sometimes be specified, which aids in determining the project’s pacing and timing.
- Props and wardrobe: The production team will be more likely to understand the precise visual elements needed for each scene if objects and clothing are included in the storyboard. To ensure a coherent and aesthetically pleasing final product, it also helps with collaboration between the costume department and the art department.
- Special effects and VFX: If necessary, special visual effects instructions for CGI (Computer-Generated Imagery) or real-world effects can be added.
If you’ve been paying attention, you’ll already know that storyboards aren’t just for the big screen or TV shows. That being said, let’s talk about all the different places where you can put those storyboarding skills to work.
Advertising
Storyboards are frequently used in advertising to plan and visualize TV commercials, print advertisements and online marketing videos . They help convey the concept and message to clients and production teams.
Storyboards inspire advertisers to create engaging narratives for their advertising. To make advertising more interesting and memorable, they can play around with storylines, character development and visual metaphors.
Video games
Storyboards can help plan the visual and interactive elements of a game. Game designers often use storyboards to map out gameplay sequences, level designs and cutscenes. This visual planning encourages innovation in narrative and game creation within the gaming industry.
Graphic novels and comics
Comic book artists and graphic novelists use storyboards to outline the narrative flow, panel layouts and visual style of their work. Storyboarding enables artists to test out various artistic approaches, color schemes and visual components. It serves as a testing ground for inventive visual storytelling.
Architecture and interior design
Architects and interior designers can use storyboards to visualize and present design concepts to clients. This can include floor plans, room layouts and material choices. Storyboards make it easier to collaborate with clients by providing design concepts in a visual manner and enabling in-the-moment feedback and innovative brainstorming.
User experience (UX) design
UX designers create storyboards to illustrate user journeys and interactions with digital products and websites. These storyboards help identify usability issues and design improvements. With the aid of storyboards, designers may test various design concepts and receive user input for ongoing improvement.
Instructional design
In the field of education and training, storyboards can be used to plan out the content and layout of educational videos, eLearning modules and training materials. Interactive learning tools like digital presentations or instructional games can incorporate storyboarding to increase learning enjoyment. For example, several tutors use storyboards in their YouTube videos , to present their knowledge and simplify the learning process.
Theater and stage productions:
Directors and set designers in theater use storyboards to plan scenes, lighting and stage setups. These visual aids assist in the production process.
Marketing and content creation:
Content creators and marketers often use storyboards to plan video content, social media campaigns and marketing materials. They help ensure that the intended message is effectively conveyed.
Product design:
Industrial designers and product developers may use storyboards to illustrate how a product is used, highlighting its features and benefits. Storyboards can be used to refine product prototypes and collect stakeholder feedback. The iterative method encourages original problem-solving and the improvement of the final result.
Event planning:
Event planners can create storyboards to visualize the setup, decor and flow of events such as weddings, conferences and trade shows. If you work for a wedding venue, incorporating storyboards into your website can visually convey complex ideas, making them easier to understand at a glance. This approach can be a valuable addition to your wedding venue SEO efforts.
Event planners can think creatively about logistics and flow by using storyboarding. It promotes creative responses to problems like crowd control and visitor engagement.
Storyboarding for presentations:
In business presentations, a simplified form of storyboarding can be used to plan the flow of slides, ensuring that the message is clear and engaging. Using storyboards, presenters can organize their presentations as storylines. The audience is drawn in by this strategy, which also engages them as it leads them through the content.
7 digital storyboarding software to visualize ideas
You can get the most out of a storyboarding app whether you’re a teacher, businessperson, ad creator, animator or social media enthusiast.
One question remains, however — what are the options and how do you decide which is best for you? Well, I’m here to help you with that. Let’s take a look at my top 7 favorite digital storyboarding software that can help visualize your ideas.
1. Adobe Storyboard CC
Adobe Storyboard CC is part of the Adobe Creative Cloud suite, making it a popular choice for many professionals. It offers a range of tools to create storyboards, including customizable templates, drawing tools and integration with other Adobe software like Photoshop and Premiere Pro. This makes it an ideal choice for filmmakers and animators who want seamless integration with their post-production workflow.
Price: While a free plan is available, you can also subscribe to the Premium plan for $9.99 per month.
2. Storyboard That

Storyboard That is a user-friendly online tool suitable for a wide range of applications, from education to marketing. It offers a vast library of pre-made characters, scenes and props, allowing users to create visually appealing storyboards quickly. Its drag-and-drop interface makes it accessible to beginners and professionals alike.
Pricing: Free; $9.99/month (For Fun); $8.99/month (For Teachers); $14.99/month (For Work)
3. FrameForge

FrameForge is tailored specifically for filmmakers and is known for its robust 3D previsualization features. It allows users to create storyboards with 3D characters and props, plan camera movements and even simulate lighting conditions. This software is ideal for filmmakers looking to plan every detail of their shots.
Price : $500 for Core Edition (or subscribe for $12.99/month); Pro starts at $799 (annual subscription is $25.99/month)
4. Toon Boom Storyboard Pro

Toon Boom Storyboard Pro is a go-to choice for animators and illustrators. It offers powerful drawing and animation tools that enable users to create detailed storyboards and animatics. The software’s seamless integration with other animation software makes it a favorite in the animation industry.
Price: Harmony essentials at $41 a year, Harmony advanced at $61.50 a year and Harmony premium at $127.50

Celtx is a versatile pre-production tool that caters to both filmmakers and writers. It includes features for scriptwriting, storyboarding and scheduling, making it an all-in-one solution for creative projects. The software allows for collaborative work, making it suitable for teams.
Price : 7 day free trial followed by paid plans at a very affordable $22.49 a month.

Boords is an online storyboarding tool that focuses on simplicity and collaboration. It offers a user-friendly interface, pre-made templates and the ability to share storyboards with team members for feedback and collaboration. It’s an excellent choice for projects that require teamwork and feedback.
Price : Starting $36/month for three users; 50 users will run you $120/month

ShotPro is designed for filmmakers and videographers who need detailed shot planning. It offers a wide range of camera angles and lens options to help users create precise storyboards. The 3D environment allows for realistic previsualization, aiding in the planning of complex shots.
Price: $9.99 monthly, $44.99 for 6 months and $79.99 for a year.
If you’re just looking for a quick and easy solution for simple project ideas — Venngage’s storyboard templates are for you. Be it for a short video, documentary, animation, product ad or business presentation, Venngage has a variety of templates and ready-to-use features that you can use to create the perfect storyboard to bring your idea to life.
How to create an effective storyboard?
To create an effective storyboard, start by defining your project’s objectives and developing a clear script or narrative. Choose the appropriate storyboard format, such as digital or traditional and sketch each frame, paying attention to composition and annotations. Review and revise your storyboard based on feedback to ensure it effectively conveys your story and visual elements.
For more tips on how to ace your storyboard, check out our detailed guide on how to make a storyboard .
What is the best format for a storyboard?
The project at hand and your personal preference will determine the ideal format for a storyboard. Traditional panels, template sheets, computer software, cards and more are examples of common formats. Whether it’s for a video, a design or other creative activity, pick the format that best meets your project’s requirements.
How do you write a storyboard script?
Writing a storyboard script involves creating concise descriptions and dialogue for each panel or frame in the storyboard. Identify scenes, add descriptions, include dialogue, maintain clarity, organize sequence panels and include notes. Ensure to review and revise all that you have.
Do storyboard examples replace scripts?
Storyboard examples do not take the role of scripts. By giving a visual depiction of the events and actions outlined in the script, they support scripts. Storyboards help designers, creators and filmmakers in visualizing how the story of the script will appear on the screen or in their creation.
While storyboards improve the planning and visualization process, the script still serves as the basis for language, character interactions and storytelling.
Are there any industry standards for creating storyboards?
Storyboard creation is not subject to any rigid industry guidelines. However, there are standard procedures and directives that experts in many different industries, like design, advertising and filmmaking follow.
These techniques include employing panels that are clear and in order, including captions or descriptions and making sure the storyboard conveys the intended visual narrative. Depending on the requirements of the project and the preferences of the creator, the precise format and specifics may change.
How detailed should a storyboard be?
Depending on the requirements of the project and the preferences of the creator or team, a storyboard’s level of depth may change. Storyboards can often be very explicit, with specific camera angles, shot compositions and visual components.
In other cases, they might be simpler, emphasizing the main characters’ actions and narrative arcs. To successfully communicate the required visuals while allowing for creative flexibility, a balance must be struck.
Can I use storyboard examples for my personal projects?
Whether you’re constructing a website, producing a commercial, making a video game or writing a tale, you may utilize storyboard examples to organize and visualize your creative ideas. They aid in the organization and expression of your ideas.
Creating a storyboard doesn’t have to be a complex process. Whether you’re planning a video, presentation or any visual storytelling project, Venngage simplifies the journey from concept to completion. So, bring your ideas to life and start crafting compelling stories with Venngage’s user-friendly platform and ready-to-use templates, in just 7 easy steps.
- Sign up or log in to Venngage : If you haven’t already, log into your Venngage account or register a new one. You’ll have access to the platform’s features and templates after doing this.
- Choose a template and customize it : Look through Venngage’s storyboard template collection and pick a template that works for your project. Start modifying the template you’ve chosen so that it fits your particular project once you’ve done so. Change the headings, sections, color scheme, font and layout to reflect your visual style and narrative voice.
- Add frames or panels : Add frames or panels to each part of your storyboard template where you’ll portray various scenarios or shots from your tale. Your tale is visually represented by these frames.
- Insert images or drawings : Insert pictures or sketches that represent the visual components of each scene into each frame or panel. To add your graphics or make drawings right in the site, use Venngage’s image upload option.
- Organize and sequence : Put the panels or frames in the order that corresponds to your story’s chronological flow. This makes it more likely that your story will be coherent and cohesive.
- Review and finalize : Check your storyboard for accuracy, completeness and clarity before putting the finishing touches on it. Make sure your story is successfully communicated. When you’re finished, save your project and distribute it to your team or other collaborators.
- Share : You may export your storyboard from Venngage in a number of file types, including PDFs and images. To receive feedback from others, you can also create a link that can be shared.
As you embark on your next big idea, remember that storyboards not only help you plan and organize your project but also facilitate effective communication with your team and stakeholders.
By choosing the right storyboard style and technique for your specific needs, you can streamline your workflow, save time and resources and ultimately create more impactful and engaging projects. Think about design guidelines that will improve the effectiveness of your storyboard. Referred to as design thinking , it promotes a user-centered approach, emphasizing empathy, creativity, and iterative problem-solving.
So, whether you’re crafting an advertising campaign, designing a video game or teaching a complex concept, consider the power of storyboards as your visual roadmap to success.
Discover popular designs

Infographic maker

Brochure maker

White paper online

Newsletter creator

Flyer maker

Timeline maker

Letterhead maker

Mind map maker

Ebook maker
If you have any questions or concerns, please contact us at [email protected] or call in at 1-800-334-4245. We are open Monday-Friday 8am-5pm EST, USA.
NOTE: Sometimes our system emails get caught in SPAM. Please contact us if you are expecting a quote or other email and have not received it.
Staff and Crew Assignment Whiteboards
Whiteboard helps coordinate crews and communicate assignments.

- Maximize the use of your most precious resource - your people
- Controlled on a high quality, dry erase whiteboard
- Manage crews among several job sites or across one large project
- Short staffed today? Simply move magnets to temporarily re-assign others to fill-in
- Popular with contractors, construction firms, and service/installation companies
- Includes FREE Supply Kit - see Detailed Description below
NOTE: Aluminum frame is standard. For a limited time, choose wood frame at checkout, in 4 color options, at no additional cost.
| Board Size H' x W' | # of Columns Across | # of 1"x3" Card Holders | Ships Via | Board with Kit | |
|---|---|---|---|---|---|
| Part # | Price | ||||
| 2' x 4' | 7 | 90 | UPS | $564.48 | |
| 3' x 4' | 7 | 140 | Truck | $704.02 | |
| 4' x 6' | 11 | 240 | Truck | $1,089.62 | |
- Use Magnetic Card Holders and colored Datacards to differentiate crews, trades, locations, and priorities
- Magnetic staff scheduling whiteboards include hidden hanger slots on back
- 1"x3" Magnetic Card Holders
- 1"x3" Datacards - white, yellow, lime, blue, salmon
- Adhesive Letter & Number Set- 1" black
- Magnetic Clips - 6"
- 1"x6" Magnets - white
- Magnet Marking Pens
- 4 Dry-Erase Markers - fine point
- Magnetic Eraser
- Hanging Hardware
| Fits in 1"x3" grid space |
- High quality magnetic staff scheduling whiteboard in an aluminum frame
- Intense heat permanently fuses your color graphics design with a sheet of solid steel to produce a highly durable, brilliant, dry-erase magnetic surface
- Our process produces a sturdy three-layer construction - the steel is laminated onto a rigid engineered wood foundation and backed with a sheet of aluminum foil as a protective moisture barrier
- WILL NOT STAIN, FADE, SHADOW OR CRACK
- No surface blemishes that are commonly seen on inferior whiteboards
- Our Polymer Fusion ™ Process creates a long lasting, custom magnetic surface
- Maintains its "like new" appearance throughout years and years of daily use
- This specialized process produces the most durable of any color printed whiteboard surface available in the market today!
- Construction is 0.022" coated sheet of solid steel laminated onto a rigid 3/8" MDF engineered wood foundation
- Service temperature range = -10F to +160F
- For indoor use
- Class C Fire rated
- Aluminum frame: Satin anodized extrusion of 6063 Aluminum-Magnesium-Silicon alloy which is extremely resistant to cracking and corrosion, framed board weighs 2.7 lbs per square foot, depth from board surface face to wall = 9/16" (14.3 mm)
- Wood frame: color stained and sealed ash, framed board weighs 3.1 lbs per square foot, depth from board surface face to wall = 15/16" (23.8 mm)
- Create a magnetic board design for your personnel management needs
- Magnetic clips are provided to route paperwork (one per column) with the job
- Datacards are supplied in 5 colors (10 per card holder) to coordinate by crew, trade, priority, location, or other distinctions
- Customize the columns and rows to fit your needs with the adhesive lettering and whiteboard lining tape
- Custom board sizes - contact Customer Service for quote
- Lining tape and additional whiteboard supplies - see Whiteboard Supplies
- Magnetic letters, numbers, symbols, card holders, clips - see Magnetic Accessories

Magnetic card holders for labelling information

Write-on-wipe-off pens for whiteboards and magnets

Perforated 8-1/2 x 11 color card sheets

Colored magnets you can write on to accessorize whiteboard
| Board Size H' x W' | 2' x 4' |
| # of Columns Across | 7 |
| # of 1"x3" Card Holders | 90 |
| Ships Via | UPS |
| Board with Kit | |
| Part # | |
| Price/Ea | $564.48 |
| Board Size H' x W' | 3' x 4' |
| # of Columns Across | 7 |
| # of 1"x3" Card Holders | 140 |
| Ships Via | Truck |
| Board with Kit | |
| Part # | |
| Price/Ea | $704.02 |
| Board Size H' x W' | 4' x 6' |
| # of Columns Across | 11 |
| # of 1"x3" Card Holders | 240 |
| Ships Via | Truck |
| Board with Kit | |
| Part # | |
| Price/Ea | $1,089.62 |
10 Best Idea Board Softwares For Creativity
")
How can one use an idea board software properly? Great ideas are the outcome of an intentional and ongoing effort of ideation and making meaningful connections.
As a result, creativity is not a magical ability.
But where do you put all those ideas that rush into your head to put them into creative execution later?
There are many different types of idea board softwares that you and your team may use for idea management.
In this post, you will learn about idea boards and how you can use software to organize your ideas in a meaningful way.
What is the best idea board software to organize anything?
Here are 10 idea board softwares to organize anything creatively:
Your Ultimate Idea Board Management Platform
Nifty isn’t just another idea board software—it’s an all-in-one platform that allows you to visually organize, plan, and collaborate on ideas in a flexible way. Whether you’re working remotely, on-site, or in a hybrid setup, Nifty gives you the tools to manage the entire ideation process from start to finish.

How We Use Nifty for Idea Management:
- Visual Idea Board: With Nifty’s Kanban boards, you can easily capture and organize ideas as they come. It’s like having a digital whiteboard where every idea gets its own space.
- Multiple View Options: I love the flexibility of switching between Kanban, list, and timeline views. It helps our team visualize ideas differently depending on the stage we’re in, whether it’s brainstorming or planning for execution.
- Real-Time Collaboration: No matter where your team is located, Nifty makes it easy to plan and develop ideas collaboratively. Everyone can contribute, provide feedback, and see updates in real time.
- Public Link Sharing: Need to share your idea boards with stakeholders or clients? With just one click, you can generate a public link to keep everyone in the loop.
- Integrations with Creative Tools: If you’re like me, you use third-party creative apps like Miro, Figma, and Invision. Nifty makes it seamless by embedding these directly into your boards, so everything is in one place.
- Custom Workflows & Automations: We’ve found that the enhanced filters and workflow automations save us tons of time. You can customize the platform to fit your specific needs, making idea execution more efficient.
With Nifty, you’re not just managing ideas—you’re driving them forward, collaborating with your team, and bringing your best creative concepts to life. Whether you’re brainstorming for a project or mapping out a long-term vision, Nifty helps you do it all in one place.
Nifty offers a free forever plan to get you started and paid plans starting at only $7/month with all core features included. Nifty is one place to organize and collaborate on your ideas.
👉 Try Nifty now – thank us later!
2. Miro (The idea board you can embed into Nifty)
Miro is an online brainstorming tool that makes it to be one of the digital idea boards. It is a great place for collaboration between team members who want to run their business with creative ideas. The only disadvantage of this tool is that there is no news feed designated within the tool. However, it can be used on the web, mobile, and Surface Hub.

- Attention management
- Mind-mapping
- Integrations
- Cloud-based
✨ Sign up for Nifty and build a better collaboration experience. It’s free.
3. ConceptBoard
Conceptboard is one of those idea boards that are designed only for the web. Those who are active in startup, enterprise, and agency management can make use of this tool to brainstorm their ideas. It is a tool that makes collaboration among team members easy and can give you the advantage of organizing a workflow that shows the progress status of your performance.

- Whiteboarding
- Brainstorming ideas
- Video conferencing
- Cloud-based
4. Ideanote
Ideanote is one of the idea boards that cannot integrate other apps though it is a great tool for teams that are working together . Any type of business team can use this tool for keeping track of the ideas that rush into their heads. One good thing about Ideanote is that it can be used both on the web and on mobile (iOS, Android).

- 100+ idea-collection templates
- Brainstorming
- Custom rating
- Real-time analytics
- Gamification: missions
5. Creately
Creately is another idea board that you can use for keeping your business ideas. Use Creately diagrams to think and collaborate visually on everything from sketching out concepts to analyzing processes to brainstorming plans. Creately is designed for businesses, marketing teams, engineering teams, and all those who have creative ideas for their business. One thing you should know about Creatively is that there is no mobile version of the tool and you can only use it on desktop.

- 1000+ templates
- Storyboarding
- Business and technical diagramming
- Drawing flowcharts and charts
- Wireframing
- Integrations with other apps
6. IdeaDrop
Idea Drop is another tool option that you can use for your business. Using this tool, you can share your ideas with your team members and grow your business more creatively. It can be used both on the web and on mobile.

- idea-cloaking
- Intelligent duplicate check to avoid plagiarism
- Gamification
7. Sampleboard (Idea board for college students)
Sampleboard is another idea board that is great for reviewing ideas among team members. If you are a freelancer, this digital idea board can be a great choice for you. However, other businesses and agencies can use this idea board as well. The disadvantage of Sampleboard is that there is no progress status to track, which means you can not organize a workflow for your tasks. Plus, you can only use it on a desktop, either Windows or Mac.

- Web clipper
- 50.000+ extensive library
- Image editing tool
XMind is a cool cloud-based mind-mapping tool that you can use as an efficient idea board. It is one of the best manager tools to work better with the team . Apart from managers, team members can use this tool to collaborate and share their ideas with their team members. It can be used both on desktop and mobile.

- Progress tracking
- Organization charts
- Logic charts
9. Thortspace
Thortspace is a digital idea board that can be used both by businesses and individuals like freelancers or students. You can review your ideas and keep them all in one place so that you can get back to them any time that you need them. One thing you should be aware of is that there is no possibility to have a workflow on Thortspace which means you cannot track the progress of your project. Thortspace is available both on web and mobile devices.

- 3D mind-mapping
- Crowd-thinking
10. Retrium
Retrium is another cloud-based idea board that you can use for your agile work environment . It is especially great for scrum teams to have their scrum boards . In addition to keeping your ideas and reviewing them later, you can also organize a workflow for your project. Remember that Retrium is only available on the web.

- Action plans
- Team radars
What is an idea board?
An idea board is a place where your team’s ideas can be collected. During a meeting, members of your team may suggest new ideas and concepts which you’d want to preserve for later.
There are two types of idea boards: traditional idea boards, which are either on paper or a whiteboard, and digital idea boards, which are a step up, collaborative, and stored on the cloud using software.
The amazing thing about digital idea boards is that they go beyond traditional idea boards in terms of functionality. Using digital idea boards, you can assign, plan, prioritize, and track them.
You can also link ideas and attach notes, files, or audio to them – something you can’t do with a traditional idea board.
What are the benefits of using an idea board?
New ideas should be executed quickly, or else they are more likely to be forgotten. So, instead of storing them in your mind, it’s best to organize them using idea boards.
This way, your team can actually share ideas, concepts, or transient thoughts collected during a collaborative meeting or brainstorming session.
When new ideas pop up during these sessions, you should collect them in a systematic way that makes sense to everyone. We suggest using Kanban visualization to keep track of your ideas and their journey.

Taken as a whole, these are the main benefits of idea boards:
- Storing your ideas and thoughts
- Visualizing ideas clearly
- Refining these ideas over time
- Collaborating with colleagues, friends, or family
- Collecting feedback
What are some characteristics of a good idea board software?
When choosing the best idea board software for your business, you should look for characteristics that make them worth working with. Here are some of these characteristics:
1. Collaboration
Good creative work is almost always a team effort. You’ll need the right tools to assist your team in working together on a project or an idea. One that keeps track of people’s performance and allows for custom tags, notes , fields, and comments, etc.
It doesn’t really matter how many team members are involved in your business. If there is no collaboration between the team members, you cannot get your business going. Therefore, you must use tools that encourage collaboration and communication among your team members.
2. Synchronization
Because your idea board will be updated regularly as the idea evolves, the ability to sync is an important feature to look for in digital idea boards. If the team is kept up to date in real-time, they can work from the same office or even remotely from anywhere in the world without facing the challenges of remote working .
3. Idea Sharing
A good sharing feature allows you to share your digital idea board with others in the department or even email it to a list of coworkers. The advantage of this sharing feature is that other people are welcome to pitch in, collaborate, review, and provide feedback. There are platforms that allow you to share information with clients and external partners via idea boards. So keep in mind to pick them when you are choosing among digital idea boards.
Final Thoughts on the Best Idea Board Software
Businesses need creativity to grow successfully. The path you need to pave as a business owner or a freelancer is full of challenges that need your best ideas to be solved. In our daily lives, we come up with different ideas while doing irrelevant things. If we don’t save these ideas somewhere safe, it is possible that we will never think of them later. As a result, it is important to choose an idea board that saves our marvelous ideas from being forgotten.
In addition, your team’s expertise and technical skills will improve as a result of the ideation process. As a result, there will be more excitement for work and you will have a strong, committed staff. The purposeful and continual pursuit of ideation is the source of your creative breakthrough. Choose at least one of the above-mentioned idea boards and get your staff on board. Start putting the pieces together. Wish you the best of luck!
Recent Articles:

Virtual Onboarding That Sticks: How to Integrate New Hires Into a Remote Team’s Culture

The Best AI Tools for Startups in 2024

The Best Business Management Software Analyzed

ALTERNATIVES
Wait before you go.
Do you really want to lose 5 productive hours a week?
Teams waste 5 hours a week on average juggling between tools. Nifty is one app for chat, tasks, docs, and more. Try it for free and see for yourself. We promise you’ll love it.
No thanks, I’ll stick with 5+ tools.
Advisory boards aren’t only for executives. Join the LogRocket Content Advisory Board today →
- Product Management
- Solve User-Reported Issues
- Find Issues Faster
- Optimize Conversion and Adoption
How to run a design thinking workshop

Design thinking workshops are an essential part of any product design initiative. They help designers speed up their work, focus on the right problems, and align easily with key stakeholders.

As a professional in the field, you are likely to be leading design thinking workshops regularly, even if they are referred to by different names. Your role is crucial, as UX design itself is heavily based on design thinking principles.
In this blog, I look deeper into how to run an effective design thinking workshop. I’ll talk about it all — what design thinking is, how you can run design thinking workshops effectively, design thinking workshop activities and exercises, who you should invite, how long it should be, and a lot more.
What is design thinking?
Most UX design principles and processes come from the basics of design thinking.
Design thinking is a five-step process of solving complex and ambiguous problems:
- Empathize — Understanding user needs and pain points
- Define — Narrowing down the research into specific problem statement(s)
- Ideate — Finding solutions to the defined problems
- Prototype — Preparing an MVP to test if the solution solves the problem
- Test — Actually testing the prototype with users

What is a design thinking workshop?
A design thinking workshop is a way of going through the design thinking process in either one meeting or a series of short meetings.
The entire design thinking process can take weeks if not months. But, a design thinking workshop aims to go through the basics and essentials quickly.
In the spirit of Agile, it’s usually beneficial to run a few smaller iterations of the design thinking process rather than go through a lengthy waterfall approach — design thinking workshops help achieve exactly that.
Unsurprisingly, the structure of a design thinking workshop doesn’t differ much from the design thinking process itself. It usually consists of five main parts:
- Gathering existing insights (since it’s hard to do any new research in such a short time)
- Defining problem
- Ideating solutions
- Choosing solutions
- Prototyping
Block 1: Gather insights
The first step to running a design thinking workshop is to ensure everyone has access to the same information and insights . Different people in the group will bring different perspectives, and the design thinking workshop is the most effective when everyone sees the same picture.
If you don’t have too many insights yet, dedicate some time before the workshops to dig deeper into qualitative and quantitative data to find them.
Optimize the workshop time by aligning on the insights beforehand. But, there will inevitably be participants who arrive at the workshop unprepared, so plan accordingly.
Block 2: Define the problem
Now that all known insights are easily available, it’s time to define a shared problem statement . You’ll likely find more than one problem to solve, but the goal is to find the most important or urgent one. Other issues can be addressed in follow-up workshops.
Without a single well-defined problem, the group will likely pull into different directions during the next steps, so spend as much time as needed on this step.

Over 200k developers and product managers use LogRocket to create better digital experiences
Block 3: Ideate on solutions
With a clear problem to solve, it’s time to ideate potential solutions.
Some teams prefer to work asynchronously at this stage, debriefing after problem identification, working independently for a few days, and then reconvening to discuss ideas. While viable, this approach limits the ability to build on each other’s ideas, which can reduce overall effectiveness.
I recommend conducting a few ideation cycles . If you have 30 minutes, don’t spend 20 ideating and 10 sharing solutions. Instead, do three quicker cycles with, say, seven minutes for ideation and three for sharing. The extra sense of urgency will energize people, and the frequent sharing of ideas will keep the inspiration flowing.
Block 4: Choosing solutions
Now, the tricky part.
The most common approach to ideating on solutions and picking the best is to rank all solutions with some framework, such as ICE or impact matrix, and focus on the most valuable one.
Here’s what I prefer doing — I prioritize options based on how much I can learn from testing them. Not only does the extra learning make the next iterations better, but it also fuels better learning about users, which will help with all other initiatives.
If you’re not pressured for quick results, prioritize learning over short-term impact. It will pay off in the long run.
Block 5: Prototyping
In theory, the last step of the design thinking workshop should be to deliver a working prototype, but I always skip this phase.
There are a few reasons for this:
- After all the previous steps, people are already mentally tired
- UX designers know best how to approach actual execution, so there’s no need to involve additional stakeholders (although getting feedback along the way is still crucial)
- In reality, it often takes a couple of days to develop and approve the final MVP
If you really want to work on prototyping with the whole group, here are a few options.
- Use a virtual whiteboard for everyone to create rudimentary wireframes for further refinement
- Share screen and design on a single file with feedback and discussions on the go
- Split into smaller groups with at least one UX designer in each and come up with a small MVP prototype each
Who should be invited to a design thinking workshop?
Inviting participants to a design thinking workshop comes with a constant tradeoff. The more people you invite, the more diverse insights and ideas you’ll get, but the less time-efficient and energized the meeting will become.
Over the years, I’ve found that the sweet spot is usually between five and eight people, with up to twelve if the problem is very complex and requires multiple perspectives.
It’s a good practice to have at least one representative from the customer support, marketing, product, design, sales, and tech teams. This mix ensures that all bases are covered and the group benefits from various insights.
How long should a design thinking workshop last?
Well, it depends. Take three factors into account:
- Size of the group
- Size of the problem
- Level of precision you are aiming for
Bigger problems and larger groups will naturally take more time. If you aim to develop a full MVP within the workshop, you’ll need more time. But a one-hour session may suffice if you’re simply looking for a starting point.
And you don’t have to cover the entire design thinking process in one go. You can break it up into multiple sessions — one for gathering insights and defining problems, another for ideation and solution selection.
Ultimately, a design thinking workshop might be anything from an hour-long session to a week-long design sprint.
If you are just starting, I recommend a three-hour session with 45 minutes dedicated to the first four steps. Prototyping can be done as a follow-up activity.
This division of hours will give you a fantastic starting point. And then, of course, you need to experiment until you find the best setup for your team.
When to run a design thinking workshop
Clearly, design thinking workshops come with many benefits. But they’re not a silver-bullet solution. They are a great tool only if you:
- Know more or less what your strategic objectives are
- Already have a healthy amount of insights
- Lack of ideas and inspiration
Without some high-level objective in mind, you’ll have problems identifying valuable insights and figuring out which problems are worth tackling first.
And if you don’t have any preexisting insights to process, focus on gathering them first. No one needs workshop outcomes based purely on guesstimates and opinions.
Lastly, if you already have tons of well-thought-out ideas, testing them out will, in most cases, give you better ROI than another ideation session.
Closing thoughts
Design thinking workshops are a minimized version of the whole design thinking process.
Although going very deep in such a short time is impossible, they can’t replace the whole design thinking process. They are a great way to make the first steps fast and adopt a truly iterative approach to product design.
Whether as an ad-hoc workshop to align stakeholders and elicit ideas or as a part of the regular iterative design process, design thinking workshops are a great addition to any UX designer’s toolbox.
LogRocket : Analytics that give you UX insights without the need for interviews
LogRocket lets you replay users' product experiences to visualize struggle, see issues affecting adoption, and combine qualitative and quantitative data so you can create amazing digital experiences.
See how design choices, interactions, and issues affect your users — get a demo of LogRocket today .
Share this:
- Click to share on Twitter (Opens in new window)
- Click to share on Reddit (Opens in new window)
- Click to share on LinkedIn (Opens in new window)
- Click to share on Facebook (Opens in new window)

Stop guessing about your digital experience with LogRocket
Recent posts:.

How to create a hamburger menu
The hamburger menu is a design classic that keeps things tidy and functional. In this blog, I will share how you can implement it effectively in your next project.

Information architecture: A guide for UX designers
Information architecture isn’t just organizing content. It’s about reducing clicks, creating intuitive pathways, and never making your users search for what they need.

A guide to the Law of Pragnanz
Oftentimes when looking at something, you can tell what looks good or bad, however struggle to verbalize why.

Enhancing UX design with lateral thinking techniques
For when you’re stuck in a UX design rut next, bring in lateral thinking. Lateral thinking will take your designs in fresh directions, solving tricky problems with unexpected creativity.

Leave a Reply Cancel reply
IMAGES
VIDEO
COMMENTS
Tip: You want your board to be visually balanced. Use visual elements to help support and convey your project information, but be careful not to make the board too cluttered. Show your data. Like photos and diagrams, charts, graphs, and tables that show your project data help a viewer better understand your project.
2. Create a detailed plan of your project and board. Before you can create your project board, you need to decide what items you're going to display on it, and how you're going to display those items. This part of your plan will depend on the type of project you're working on.
Template #1: 9 Square Design your Own Digital Choice Board. Template #2: Creative Book Trailers Ideas. Template #3: Geography Fun Choice Board. Template #4: Digital Breakout. Template #5: Digital Menu for Student Creation. Template #6: Choose Your Own Adventure (Slides & Forms) Template #7: Show What You Know. Template #8: Genius Hour.
First, find blank poster board (or foam core) in sizes appropriate for your project. You'll need at least a 24×36-inch poster board for your display board's background (this is called a "background board"). Then, find an image file or paper printout of your project.
Milanote is an easy-to-use tool to organize your ideas and projects into visual boards. Add notes, images, links and files, organize them visually and share them with your team. ... Milanote's flexible drag and drop interface lets you arrange things in whatever way makes sense for your project. Collaborate with your team. Use Milanote as your ...
Key Info. For almost every science fair project, you need to prepare a display board to communicate your work to others. In most cases you will use a standard, three-panel display board that unfolds to be 36" tall by 48" wide. Display boards can be found at Amazon and other retailers. Organize your information like a newspaper so that your ...
Bingo is another style of choice board that is easy to use with your students. Samantha Selikoff, technology teacher in New Jersey shared her design for Kodable Bingo earlier this summer. Using the Seesaw activity creator, it is easy to create the bingo design for kids to complete on their own. Step 1.
Use bullet lists, multiple paragraphs, and white space on your board to avoid an overwhelming amount of text. 6. Glue all of your sections to the board. Use a gluestick and trace the perimeter of each item that you will glue to the board. This will help keep corners from pulling away from the board.
Use the steps of the scientific method or engineering design process as a guide. The stages of a student's project can be used to help prepare and organize the sections of the display board. Make use of headers. The title, headers, and even subheads help a user make sense of the material on the board at a glance. Pay attention to the assignment.
Staff Scheduler Lift-Out Whiteboards. Coordinate team schedules with movable week panels. Workstations Scheduling Whiteboard. Assign staff to work stations by time slot. Help your staff stay organized on the job with one of our assignment planning whiteboards! Browse through our job scheduling and planning dry erase boards.
Create a matching game. Have your students match math problems to their answers, spelling words to their phonics sounds, or states to their capitals with an interactive matching game posted on a bulletin board. 3. Give students a game to play. Set up a bulletin board with a giant game board, such as sudoku.
14. Job wheel. Source: Teach-a-Roo. Create this awesome wheel to help kids keep track of classroom tasks. Jobs go on the inner wheel; kids rotate. 15. Reverse job wheel. Source: Cookin' Up In First. In this one, the kids are in the middle, and the jobs rotate.
Dec 5, 2019 - Explore Avery Williams's board "Teachworthy Assignment Board" on Pinterest. See more ideas about classroom organization, classroom, teaching classroom.
Jun 26, 2024 - Explore Chuck Koehler's board "Teachworthy Assignment Board" on Pinterest. See more ideas about high school math classroom, middle school classroom, parents as teachers.
Here are clever ideas for every month of the year. 18 January Bulletin Board Ideas To Welcome In the New Year. 18 Creative February Bulletin Board Ideas. 21 Fun Bulletin Board Ideas for March. 20 Inspiring April Bulletin Boards for Classrooms. 16 Uplifting May Bulletin Boards for Classrooms. 15 June Bulletin Board Ideas To Brighten Your Classroom.
Critical Path Mapping Kits. like earlier Gantt and PERT charts, gives your team the tool to break complex projects down and find the fastest, easiest, most efficient path to completion. Trust Magnatag with your project management whiteboard needs. The leading source in visible systems since 1967. Shipping within 3 days or less.
2. Lines and board headings are heat-fused printed into the porcelain-like dry-erase magnetic steel whiteboard surface to stay like new for a lifetime of daily use. 3. Magnetic 1"x 8" cardholders in 5 colors with card inserts in 10 colors for department name, tasks, or your own code. Download your card-keying templates here.
Aug 18, 2024 - Explore Rick Vazquez's board "Teachworthy assignment board" on Pinterest. See more ideas about classroom organization, school classroom, teaching classroom.
Our Polymer Fusion™ Process embeds your colors, custom graphics, and design directly into our polymer surface to produce a brilliant & highly durable magnetic whiteboard that's resistant to shadows, stains, fading and cracking. Click on a picture for Schedule Whiteboard descriptions, sizes, and prices. 34 items.
These employee communication boards are great for communicating statuses and staff assignments. Keep everyone informed with our personnel whiteboards! If you have any questions or concerns, please contact us at [email protected] or call in at 1-800-334-4245.
Here are a few ideas: Create a video to share a solution to a common household problem. Write a short story about a STEM topic Make a simple invention out of household materials Try designing boards for students using a tool like this choice board generator. 5. Create STEM kits to use at home.
The 3D environment allows for realistic previsualization, aiding in the planning of complex shots. Price: $9.99 monthly, $44.99 for 6 months and $79.99 for a year. If you're just looking for a quick and easy solution for simple project ideas — Venngage's storyboard templates are for you.
65795. $1,089.62. * Price includes a Supply Kit of useful accessories. Additional Information. Detailed Description. Use Magnetic Card Holders and colored Datacards to differentiate crews, trades, locations, and priorities. Magnetic staff scheduling whiteboards include hidden hanger slots on back. Includes FREE kit of whiteboard supplies:
Image editing tool. Cloud-based. 8. XMind. XMind is a cool cloud-based mind-mapping tool that you can use as an efficient idea board. It is one of the best manager tools to work better with the team. Apart from managers, team members can use this tool to collaborate and share their ideas with their team members.
Some teams prefer to work asynchronously at this stage, debriefing after problem identification, working independently for a few days, and then reconvening to discuss ideas. While viable, this approach limits the ability to build on each other's ideas, which can reduce overall effectiveness. I recommend conducting a few ideation cycles. If ...